});
Showing posts with label medicinal herbs. Show all posts

Friday, April 15, 2016

Homemade Tincture Press

The $12 Tincture Press

Medicinal Plants: The $12 Tincture Press

(As featured in the June 2011 issue of Practically Seeking)
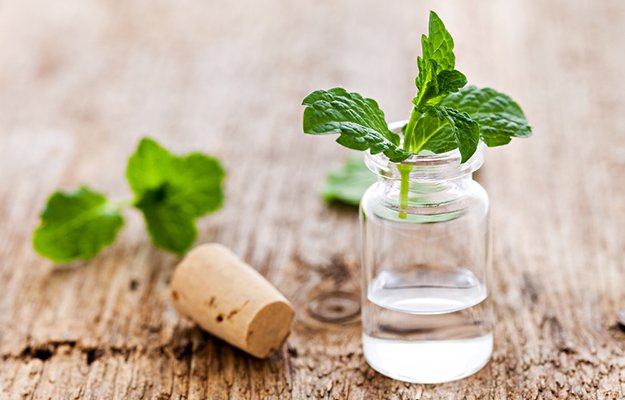
When making tinctures and infused oils you want to be sure and get every last drop of goodness from the plant materials you are using. For most of us, the traditional "solution" has been to put your plant material into fabric or cheesecloth and then proceed to squeeze by hand as hard as you can!

While this method does work, it leaves a LOT of your precious liquid behind.

Commercial presses are available, but they cost anywhere from $50 to $500 and for most of us home herbalists this is just not cost effective. Now you can call me cheap if you want to, but after a little pondering and a bit of good ol' southern engineering I created my own press (which works remarkably well) out of a couple of scrap pieces of 2x4, two metal bowls out of the kitchen cupboard, and a couple of nuts and bolts from the hardware store. Total cost to me: $11.34. 
Now that's more like it!
Here's what I did…

Step-by-step Instructions on How to make a Tincture Press:

  1. You will need to pull together the following items that can be found in any hardware store:
    — Two pieces of 2x4, each 10 1/2 inches long
    — 2 - 1/2" hex bolts, 10 inches long
    — 4 - 1/2" fender washers
    — 2 hex nuts
    — 1 - 6" x 3/4" hex bolt
    — 2 - 3/4" hex nuts
    — 1 - 3/4" fender washer 
    Now head over to the Plumbing department around the iron pipe fittings and obtain an Iron "1/2 inch flange". (Your looking for a flat metal thing with 4 holes in it.) You will also need two small stainless steel bowls of the same size — inexpensive kitchen bowls or pet dishes work great.
  2. What you need
  3. Take your 2x4 pieces and measure in 1 inch from the end and mark that point with a line, then measure and mark the center of that line. Do the same thing at the other end so that each piece as two marks on it, one at each end. These are your drill points. Now drill out a 1/2 inch hole all the way through your board on each mark. You should have a total of 4 holes, two on each board, and they should line up when you place one board on top of the other.
  4. Draw line one inch from end Mark the center of each line Drill the center point of  your line Drill second piece
  5. On one of your 2x4 pieces draw line diagonally from corner to corner in both directions, making an "X". Drill a 3/4 inch hole at the center point of your "X".
  6. Draw an X on ONE piece Drill through the center of your X
  7. Place a 1/2" fender washer on to each of your 1/2" bolts and then insert the bolt through the drilled holes in each end of the 2x4 that has only 2 holes in it. Put a hex nut on each bolt and screw it about two inches down the thread.
  8. Thread bolt through end hole Repeat with second bolt Add hex nut
  9. Slide the 2x4 with 3 holes on the bolts on top of the other 2x4, place another fender washer on each bolt on the outside of the piece of wood and screw a hex nut on each bolt. You now have a fender washer on the outside of each piece of wood, and hex nuts holding the top piece in place. You do not need to tighten the hex nuts down at this point.
  10. Slide 2nd board on top Put fender washer and nut on top Both boards in place
  11. Put your 6" long, 3/4" bolt down through the center hole of your top 2x4. Put on the fender washer and both hex nuts. Tighten the top hex nut up against the bottom side of the 2x4, holding the fender washer in place against the wood.
  12. Insert 3/4-inch center bolt Put on both hex bolts
  13. Screw the 1/2" flange onto the 3/4" bolt until the bolt is flush with the bottom of the flange, then tighten the lower hex nut down against the flange.
  14. Placing flange
  15. Put your 2 stainless steel bowls under the flange. Place your plant material in your bottom bowl with the second bowl sitting on top. Adjust the center 3/4" bolt as needed to seat the flange and upper bowl firmly down on the material to be pressed.
  16. Place plant material in bowl Place first bowl in press Place second bowl atop first Seat flange firmly against second bowl
  17. Tighten the nuts on the two OUTER bolts, evenly and a little at a time, causing the flange to press down on the top bowl squeeze down on your plant material. (Use a wrench as necessary.)
  18. Tighten down the outer bolts evenly Tighten with wrench if necessary
  19. Continue to slowly tighten down on the two outer bolts and pour off the resulting liquid a little at a time.
  20. Slowly tighten outer bolts Lift press to pour off liquid in bottom bowl Collect resulting liquid
  21. Repeat steps 9 and 10 until you can no longer get the nuts to tighten down any farther. THEN, open the press by loosening the center bolt to raise the flange high enough to remove the bowls, re-bundle the plant material and repeat the process another time or two until you are not extracting any more liquid.
  22. Continue to tighten down Pour off resultant liquid Remove bowls and re-bundle plant material before returning to press
  23. By the time you finish your plant material should be virtually dry, and can be tossed in to your compost to help nurture future medicinals. I have successfully used this press to extract an additional half cup to almost a full cup of liquid that would have otherwise been lost — what can be the most potent part of the medicine!
  24. Dry cake of remaining plant material The most potent liquid!

    Source:
    http://practicalprimitive.com/skillofthemonth/tincturepress.html

    Books of interest:


Monday, April 4, 2016

Mother Nature’s Best Home Remedies

Home remedies, or natural remedies, are typically grown in the comforts of your own backyard, or for many the comfort of the wilderness. Medicinal plants and oils have been know to serve as remedies for ailments both major and minor. They are Mother Nature’s healthy alternative to conventional medicine, and have been used longer than we can imagine. Even the ancient Egyptians utilized these home remedies!
If ever left without modern medicine, knowing a little about nature’s remedies for common ailments could prove crucial to your health and wellness in a survival situation.
We’ve gathered some essential medicinal plants and oils, and their cures, that you should have on hand for your next home remedy.

10 Medicinal Plants


Great Burdock
This root is used to treat ‘toxic overload’ that result in throat infections and skin diseases like : boils, rashes, burns, bruises, herpes, eczema, acne, impetigo, ringworm and bites.
Marsh Mallow
This root internally treats: inflammations and irritations of the urinary and respiratory mucus membranes, counter excess stomach acid, peptic ulceration, gastritis. Externally, the root is applied to bruises, sprains, aching muscles, insect bites, skin inflammations and splinters.
If you miss making s’mores when STHF – this is also the plant marshmallows are made from!
Aloe Vera
The sap from Aloe Vera is extremely useful to speed up healing and reduce the risk of infections associated with wounds, cuts, burns, eczema, as well as reducing inflammation.
Aloe Vera taken internally may treat: ulcerative colitis, chronic constipation, poor appetite and digestive problems.
Pot Marigold
Pot Marigold is a great remedy for skin problems, including bites, stings, sprains, wounds, sore eye and varicose veins.
Internally it may treat fevers and chronic infections. The tea of the petals tones up circulation and, taken regularly, eases varicose veins.
Gotu Kola
This plant acts on various phases of connective tissue development and stimulates healing of ulcers, skin injuries, decreasing capillary fragility, stimulation of the lipids and protein necessary for healthy skin.Crushed leaves are poulticed to treat open sores. It can also be used to treat leprosy, revitalize the brain and nervous system, increase attention span and concentration and treat venous insufficiency.
Camomile
In addition to aiding problems with the digestive system, it has a soothing and calming effect like aromatherapy, used to end stress and aid in sleep. The herb is also used to treat common aches like toothache, earache, shoulder pain and neuralgia.
Chinese Yam
It is sweet and soothing to the stomach, spleen and has a tonic effect on the lungs and kidneys. Internally, it treats tiredness, weight loss, loss of appetite, poor digestion, chronic diarrhea, asthma, dry coughs, uncontrollable urination, diabetes and emotional instability.
Externally, it may be applied to ulcers, boils and abscesses.
Echinacea
The echinacea has the capacity to raise the body’s resistance to bacterial and viral infections by stimulating the immune system. It also has antibiotic properties that helps relieve allergies. Basically, the roots are beneficial in the treatment of sores, wounds and burns. It was once used by the red indians as an application for insect bites, stings and snakebites. The echinacea grows on any well drained soil, as long as it gets sunlight.
Great Yellow Gentian
This root is a bitter herb used to treat digestive disorders and states of exhaustion from chronic diseases. It stimulates the liver, gal bladder and digestive system, strengthening the overall human body. Internally, it may treat liver complaints, indigestion, gastric infections and aneroxia.
Siberian Ginseng
This herb is a powerful tonic herb that maintains good health. It’s medicinal properties are used for menopausal problems, geriatric debility, physical and mental stress, and treats bone marrow suppression caused by chemotherapy or radiation, angina, hypercholesterolemia and neurasthenia with headache, insomnia, poor appetite, increasing endurance, memory improvement, anti-inflammatory purposes, immunogenic purposes, chemoprotective purposes and radiological protection.(See full article at Backyard Garden)

Who knew weeds were good for something? Check out these 10 weeds and their healing properties:


Medicinal Plant Oils | Essential Oils

Chances are you’ve heard of essential oils, which are oils extracted from medicinal plants. Here are a few or our favorite essential oils we are sure to keep readily available in the medicine cabinet:

Peppermint Essential Oil

peppermint-essential-oil

Peppermint is nicknamed ‘the world’s oldest medicine’, with archaeological evidence placing its use at least as far back as ten thousand years ago. Peppermint is naturally high in manganese, vitamin A and vitamin C. Crushed leaves rubbed on the skin help soothe and relax the muscles. Peppermint oil is most commonly used for:
  • reduce irritable bower syndrome
  • against upset stomachs
  • inhibit bacterial growth
  • treat fevers
  • flatulence
  • spastic colon
  • nausea
  • headaches
(Read more at Fractured Paradigm)

Sage Essential Oil

sage-essential-oil

Sage is one of our favorite oils. It has many diverse health benefits including:
  • Stomach pains
  • Coughs
  • Cramps
  • Eliminates scars
  • Purifies blood
  • Digestive aid
  • Reduces fever
  • Stimulates the brain
(See more health benefits at Organic Facts)

Tea Tree Essential Oil

tea-tree-essential-oil
Tea tree oil is often referred to as “medicine cabinet in a bottle,” as it’s remedies are seemingly endless. Check out these 79 uses for the ultimate survival remedy:
  1. Abrasions and minor cuts
  2. Acne
  3. Air freshener
  4. Allergies
  5. Arthritus
  6. Asthma
  7. Athletes foot
  8. Baby care
  9. Bacterial infections
  10. Bad breath
  11. Bladder infection
  12. Blisters
  13. Boils
  14. Bronchial congestion
  15. Bronchitus
  16. Bruises
  17. Bunions
  18. Burns
  19. Calluses/corns
  20. Canker sores
  21. Carbuncies
  22. Chapped lips
  23. Chicken pox
  24. Chigger bite
  25. Cold sores
  26. Coughs
  27. Dandruff
  28. Dermatitus
  29. Dry skin
  30. Eczema
  31. Emphysema
  32. Flea bites
  33. Gout
  34. Gum disease
  35. Head lice
  36. Hives
  37. Homemade mouthwash
  38. Household cleaning
  39. Immune system
  40. Infected wounds
  41. Inflammation
  42. Ingrown hair
  43. Insect repellant
  44. Jock itch
  45. Laryngitis
  46. Laundry helper
  47. Mildew/mold remover
  48. Mosquito bites
  49. Muscle aches/pains
  50. Mumps
  51. Nail fungus
  52. Pest control
  53. Plantar warts
  54. Psoriasis
  55. Rashes
  56. Rheumatism
  57. Ringworm
  58. Rubella
  59. Scabies
  60. Sciatica
  61. Seborrhea
  62. Shingles
  63. Shock
  64. Sinusitis
  65. Sore muscles
  66. Sore throat
  67. Staph infection
  68. Stye
  69. Sunburn
  70. Tattoos
  71. Thrush
  72. Ticks
  73. Toenail fungus
  74. Toothbrush cleaner
  75. Tonsillitus
  76. Vaginal infection
  77. Viral infections
  78. Warts
  79. Wounds
(See how to apply tea tree oil to these ailments at LA Healthy Living)

There are an endless array of medicinal plants and essential oils. Let us know what other home remedies you are using in the comments below!

Source:
http://survivallife.com/mother-natures-best-home-remedies/

Wednesday, March 23, 2016

How to Make Dandelion Salve

This post my contain affiliate links. Thank you for your support! 
We’re only about a month into our gardening season here in Montana and already my hands are dry and chapped. I’ve been using a variety of lotions and skin creams to replenish the moisture in the rough skin on my hands but have had little success in finding a lasting solution. I decided to create my own skin nourishing dandelion salve. This stuff is simply amazing! It is easy to make, low cost and leaves my hands feeling soft and nourished for hours. I’ve also used dandelion salve and infused oil on my achy lower back after a long day of gardening and it helps soothe my sore muscles. The best part? I was able to use a little beeswax from our new honey bees!

Rosemary Gladstar's Medicinal Herbs: A Beginner's Guide: 33 Healing Herbs to Know, Grow, and Use

How to make homemade dandelion salve
The Ultimate Dandelion Cookbook: 148 recipes for dandelion leaves, flowers, buds, stems, & roots

I’ve read quite a few articles this spring about foraging and eating dandelions. One article I read listed the health benefits from the various parts of a dandelion plant. I was intrigued that the flowers have pain relieving properties and can also be used as a massage oil. I started making infused oils a few years ago but had never tried dandelion infused oil. We have plenty of dandelions around our property so foraging would be easy.
There are a lot of recipes floating around the internet for homemade balms, salves and lotions. My frustration with a lot of them is that they include a lot of ingredients I don’t have on hand. I’ve almost invested in some of these products but couldn’t ever bite the bullet and do it. Often these products can be expensive and not something I’ll use often enough to make the investment. What I love about this recipe I created is that it includes some pretty simple ingredients that most people already have at home or can purchase for a low cost. Making and using all natural skin care products doesn’t have to be expensive!

Making Dandelion Infused Oil

Making infused oils is fairly simple. To make dandelion infused oil, you need to harvest a bunch of dandelion flower heads. I cut them off the stem as high as I could to minimize the amount of green foliage being harvested. I wasn’t quite sure how many to harvest, so I filled a large bowl. This ended up being about four cups of fresh dandelion heads.
I read several different articles about making dandelion infused oil and one thing everyone mentioned was being mindful of the high water content in dandelion flowers. To minimize getting a bunch of icky sludge in your infused oil, dry the flower heads out for a day or two. I spread them out on a cloth inside a cardboard box lid and sat them on top of our chest freezer for two days.

drying dandelions for infused massage oil and homemade salve

Once the dandelion flowers have dried a bit, pack them into a glass jar. I used a pint size canning jar and had just enough space for all the flowers. Next pour olive oil into the jar. Make sure the dandelion flowers are all completely covered with oil. Place a lid on the jar.

There are two ways to infuse oil. The way I first learned several years ago was the slow infusion method that I learned from this amazing book.  This method requires sitting the jar of oil out of direct sunlight for four to six weeks. If you want a speedier process, you can heat the oil in a jar on the stove. I opted for this method since I was anxious to make some salve and heal my dried out skin. 
I put a small pot on the stove with a few inches of water in the bottom. Then I sat the glass jar of oil and flower heads in the pan and turned it on medium. Once the water heated up but not boiling, I turned it off and let the jar sit in the pan of water until it all cooled off. Then I put the jar in the cupboard to continue infusing.
My jar infused for well over a week. This was mainly because I was so busy working in the garden I didn’t have time to make the salve!  The infused oil could actually be used after two or three days. After it is done infusing, strain the flowers from the oil. I use a small fine mesh sieve and press the flowers down into the sieve to press out as much oil as I can. Compost your flowers and the infused oil is now ready to use!


Making Dandelion Salve

Making salve is an easy project if you have the supplies handy. I have a lot of the supplies on hand since I’ve been making homemade lip balm and selling it in our Etsy shop for the last couple years. This recipe will make a large batch (a little less than 1.5 cups). If you want a smaller batch, reduce the quantities but keep the proportions the same.
This salve can feel a bit greasy when you first put it on. I’ve found that after 15-20 minutes the greasiness goes away and my hands just feel so soft. I put a generous scoop of dandelion salve on my hands before I go to bed and just love how soft my skin feels when I wake up!

Supplies:

-16 oz of infused dandelion oil
-2 oz coconut oil (this is the kind we use)
-2 oz of beeswax (I bought these since they were lower cost and easy to shred, but now we render our own beeswax to use)
-OPTIONAL: 10-15 drops of lavender essential oil (or whatever scent you prefer!)

Step 1: 

Place the beeswax and coconut oil in a glass jar or measuring cup. Sit a pan on the stove with several inches of water in it. Sit the glass jar down in the pan and heat on low/medium.

easy DIY dandelion salve

Step 2: 

Once the beeswax and coconut oil are melted, carefully stir in the infused dandelion oil. Our house was cool when I made this, so when I poured the dandelion oil in some of the wax started hardening up. If this happens for you, keep heating the mixture until it is all melted again.

Step 3: 

Add in essential oil if you prefer and stir well.  The dandelion oil does have a dandelion scent but I I love the scent of lavender so chose to use this essential oil as an added scent.

Step 4: 

Carefully remove the glass jar from the pan. I wanted one big jar of dandelion salve so the jar I mixed it in was the jar I let it cool off in. If you want smaller containers of salve, pour the mixture into smaller containers. Allow the salve to cool.
This dandelion salve has a firm consistency. Since there is coconut oil in it, as soon as you scoop some into your hands it softens and melts. This creates an easy to spread salve. I started out using this just on my hands but then started using it for rough, cracked skin on my feet. I also use it to nourish dry skin on my arms and legs.
After making a big batch of dandelion salve, I had some dandelion infused oil left over. Since the infused oil is  to help with pain relief, I filled an empty amber glass bottle to use for massage oil. When we have aches and pains in our back or feet, I can use this massage oil to naturally help with pain relief.
After spending the whole day transplanting seedlings into the garden on Saturday, my lower back was so achy I could hardly walk. I rubbed dandelion infused oil on my lower back and felt some relief. It didn’t make all the aches and pains go away, but it did lessen the pain. Whoever said dandelions are weeds and should be destroyed must never have tried a dandelion salve or massage oil. This stuff is amazing!

Source:
http://montanahomesteader.com/make-dandelion-salve/#comment-29975

Books Of Interest: