});

Thursday, April 14, 2016

DIY Solar Oven

 
A Do-It-Yourself Solar Oven, is a simple, low cost project that anyone can complete in a couple of hours, once you have collected the materials. We'll start with a very simple design, that gives you a working solar oven.

Materials for a Solar Oven

  • Cardboard box, around 20" x 20" x 18", double-walled corrugated cardboard works best.
  • A sturdy piece of cardboard, just slightly larger than the opening of the cardboard box. If the cardboard box is 20" x 20", then make this piece around 21" x 21".
  • Tape. Duct tape works well.
  • 1" thick hardboard insulation - enough to cover the bottom and sides of the box. Not styrofoam.
  • Heavy duty aluminum foil - about 10 square feet.
  • White glue.
  • Flat, black spray paint - used for BBQ or wood stoves works best.
  • A big roasting bag or a piece of glass, slightly larger than the opening of the box.
  • A BBQ thermometer.

Assemble the Solar Oven

  1. Bend the flaps of the cardboard box, OUT and DOWN and tape them down at the corners.
  2. Prepare the insulation & aluminum foil & glue into the box.
    • Cut the insulation to size, to fit the bottom & 4 sides of the inside of the box - if you don't have insulation you could use several pieces of cardboard instead. If you double the pieces of insulation, you get even better results.
    • Glue aluminum foil to one side of each piece of insulation and spray with black paint.
    • Glue the pieces of insulation into the box, with the black sides facing the inside of the oven.
  3. Prepare the Lid
    • cut a piece of cardboard slightly larger than the opening of the oven. Then cut out a hole the same size as the opening of the oven and tape the roasting bag over this hole (single ply only).
    • if using glass, you don't need the cardboard or roasting bag. Just ensure the glass is slightly larger then the oven opening and makes a good seal when placed on the top.
  4. Poke BBQ thermometer through front of oven and seal with tape.

Cooking with your Solar Oven

Aim the oven into the sun by looking at the shadows - don't look at the sun. Periodic repositioning into the sunlight will be required.
Place a drip pan at the bottom of the oven, to catch spills, boil-over's, etc. You need a black pot with a snug lid for cooking. Glass jars, painted black, also work well. Try different pots till you find one that works well. Remember that the pot or jar can get very hot!
This simple oven will work well for warming rolls and keeping cooked items hot. It also works well for items that don't need a set temperature (rice, beans, soup, corn of the cob).

Improving your Solar Oven Design

Materials

You might want to try using plywood rather than cardboard for a longer lasting oven. For sure, you'll want to use a glass window rather than roasting bag. Improve your seal around the glass window and all the joints in the oven to reduce heat loss.

Reflectors

DIY Solar Oven with Reflectors

You can boost the heat quite a bit with reflectors. These can be fairly simple as well - cardboard, with aluminum foil glued to them, and taped together and to the oven. Use the shadows to aim everything towards the sun.

Size

Bigger capacity ovens with larger reflectors are capable of getting really hot. They are also easier to work with: getting food in and out.

Source:
https://web.archive.org/web/20130430193223/http://greenterrafirma.com/diy-solar-oven.html

Wednesday, April 13, 2016

DIY Chicken Plucker


I know my track record is not great when it comes to delivering promised posts on certain topics. I'm trying to make amends this week. So today it's a post on the homemade chicken plucker that I used to help process my three layers last week.

The idea came from someone named RedneckPete, who posted about this invention, calling it the $6 chicken plucker. You can see a video of this plucker in action here. (Don't click either link if you're squeamish about such things.) I came across this last year, when I first anticipated slaughtering my older laying hens in late fall. I can't remember exactly what the materials cost me when I went shopping for this project, but it was more than $6. I'm sure it was less than $20 however. I bought a PVC endcap, a short length of small diameter all-thread, a package of six rubber bungee cords, and a few bolts and washers. I already had the Makita drill.


The way it works is that the S-hooks are removed from the bungee cords and the cords trimmed to leave about 3" of material attached to each end. Then holes are made evenly around the PVC endcap to take the rubber "fingers" from the bungee cords. The wide ends where the S-hooks attached anchor the rubber inside the endcap. The all-thread passes through a hole drilled at the top of the endcap and offers purchase and a good grip for the electric drill. The business ends of the fingers whirl around and strip the feathers from a scalded carcass before evisceration.


I found that this worked reasonably well during my first processing experience. I still had to pluck some feathers by hand. If I'd had another pair of hands to help, it might have been better. As it was, I had to duct tape the drill to a sawhorse and depress the trigger with one hand while I manipulated the chicken carcass with the other. The largest feathers on the wings easily resisted the homemade chicken plucker, as did the finest pin feathers. Most of the others came right out.

For the very small amount of slaughtering I'm likely to do from year to year, this simple plucker will suffice. If I had ambitions for raising my own broilers in larger numbers, I might consider the Whizbang plucker, which is far more complicated and expensive to build, but can handle three chickens at a time. Harvey Ussery wrote about building one of these, and he seemed quite pleased with the performance. The drill chicken plucker is obviously a quick and dirty contraption compared to the Whizbang. But since the low end estimates for building a Whizbang come in at $600 or so, I'll stick with the <$20 model for now.
 
Source:
http://livingthefrugallife.blogspot.com/2009/07/diy-chicken-plucker.html
 
Books Of Interest:


Monday, April 11, 2016

Rainwater Harvesting Methods

How to Harvest Rainwater?

So you're convinced that you want to start collecting rainwater at your house. Below you will find the resources to educate yourself on the best method for harvesting rainwater in your situation. You will also find information about the basic components of a rainwater collection system. Even though rainwater catchment is an old technology, there have been many improvements over time through product innovations.

What are the different methods to collect rainwater?

The only thing that differs in the following methods is the scale of the system. They all follow the same principles but differ on aesthetics and actual water conservation effectiveness. Click the pictures for a closer look.

Rain Barrels

Rain barrel to capture a small amount of rainwaterThis method is the most common and one that many people are familiar with. This involves installing a barrel at a gutter downspout to collect rainwater. The actual barrel may be a recycled barrel or a new commercially available rain barrel.
Pros:
  • Easily implemented by anyone at any residence
  • Barrels are readily available in your community or at various stores & websites
  • Barrels don't take up much space so they can fit into any situation
Cons:
  • Capacity is generally only 50 to 100 gallons
  • Easily overflows and wastes collection opportunities

"Dry" System

A dry system rainwater collection system where the pipes dry out after a rain eventThis method is a variation of a rain barrel set-up, but it involves a larger storage volume. Essentially, the collection pipe "drys" after each rain event since it empties directly into the top of the tank.
Pros:
  • Can store a large amount of rainwater
  • Great for climates where rainfall happens with infrequent, larger storm events
  • Can be inexpensive to implement
  • Less complicated system so maintenance is easier
Cons:
  • The storage tank must be located next to your house

"Wet" System

A wet system rainwater collection system where the pipes stay wet after a rain eventThis method involves locating the collection pipes underground in order to connect multiple downspouts from different gutters. The rainwater will fill the underground piping and the water will rise in the vertical pipes until it spills into the tank. The downspouts and underground collection piping must have water-tight connections. The elevation of the tank inlet must be below the lowest gutter on the house.
Pros:
  • The ability to collect from your entire collection surface
  • The ability to collect from multiple gutters and downspouts
  • The tank can be located away from your house
Cons:
  • More expensive to implement due to underground piping
  • Sufficient difference between gutters and tank inlet must be available


How do I create a complete Rainwater Collection System?

The image below shows a complete rainwater collection system. While some of the components shown are absolutely necessary, not all of the components listed are required. Although, all of these components will help create a harvesting system that is highly functional and nearly maintenance-free.
Rainwater collection and harvesting system components

Collection surface for rainwater harvestingCollection Surface Collection surface for rainwater harvestingCollection Cistern
Collection surface for rainwater harvestingCollection Gutters Collection surface for rainwater harvestingOverflow Port
Collection surface for rainwater harvestingGutter Protection Collection surface for rainwater harvestingAuto-fill / Automatic Top-up Mechanism
Collection surface for rainwater harvestingRain Head Inlet Filter Collection surface for rainwater harvestingPump
Collection surface for rainwater harvestingFirst-flush Diverter Collection surface for rainwater harvestingWater Filter
Collection surface for rainwater harvestingInlet Screen Collection surface for rainwater harvestingWater Level Indicator


What kinds of rainwater storage tanks can I use?

Well, you can collect rainwater into any storage vessel but here are some of the more popular, commercially available, rainwater collection tanks. Every tank has its' own pros and cons and different situations call for different tanks. One important note to remember is to ensure that your base preparation is performed in accordance to the tank manufacturer's instructions. These rainwater storage tanks will be extremely heavy when water is present inside them. Remember, water weighs 8.34 pounds per gallon!


Some issues to think about when installing a rainwater system

Flying Pipes

Pipes flying through the air to collect rainwater from multiple downspoutsThis issue is not necessarily bad as it allows for a higher efficiency of collection, but for most people, they don't want to see PVC pipe flying overhead at their homes. Some other things to think about is the possibility of damage to the collection pipes from storms and injuries to people who could run into the pipes.

Tank material that allows sunlight inside

Translucent tank that exposes rainwater to sunlight and produces algae in the tankDo not use a translucent plastic tank for rainwater storage! The system may look great right after being installed, but unless you constantly put chlorine bleach into your tank, then the water inside the tank will grow algae and will look like pea soup. Click on the image to see this. These translucent tanks are meant for chemical storage not for raw water storage.

Water level indicator using a clear pipe

Clear pipe used as water level indicator that becomes caked with algaeYou find this type of water level indicator promoted on many DIY rainwater collection websites. Well, as in the previous issue with the clear or translucent tank material, the same phenomenon will occur with these clear pipe or clear flexible tubing water level indicators. The water in the indicator pipe is exposed to sunlight which promotes the growth of algae inside the clear pipe. Even if the indicator has a drain valve in it, the water vapor trapped in the clear pipe can still grow algae. Click on the image to see what the clear pipe water level indicator looks like after some time of use.

If you install a water level indicator on your rainwater storage tank, make sure to use a different technique than a clear pipe indicator.

First-flush diverter that mixes with good rainwater

First-flush diverter that doesn't separate first flush from good rainwaterThe purpose of a first-flush diverter (as seen in this image) is to divert the first bit of rainwater that drains from your collection surface. This first bit of rainwater has the highest concentration of dust and other particles. The diverter shown in this image is normally called a "poor man's diverter". As you can see though, the initial flush of water that has filled the pea-trap shaped pipes just pushes into the collection tank. In this configuration, you get no benefit... you might as well connect the downspout pipe straight to the tank inlet.


How can Innovative Water Solutions help me out?

Find out about our Rainwater Collection System Installation Services.

Source:
http://www.watercache.com/education/rainwater-how/

Thursday, April 7, 2016

Solar Food Dehydrator - 8 Designs and plans

solar food dehydrator

8 Free DIY Or Homemade Solar Food Dehydrator

 The importance of quality food in daily life cannot be ignored. If all you seek is taste, freshness and nutrition, then only a local farmer or your own garden can facilitate your need. Not every fruit or vegetable that you like would be available around the year. So, how to plan a healthy lifestyle while making sure you get what you want throughout? There are different methods of preserving food, but what way seems more legit to you? Have you heard about diy solar food dehydrator – they are absolutely worth it.
You do not have to spend much money in acquiring them from the market as homemade food dehydrator can do the job for you. You might be thinking how on earth is it possible to craft a solar food dryer at your home? Well, here are 8 simple yet effective DIY plans which would answer your biggest question, “how to build a food dehydrator”?
 

1: Simplest solar food dryer

If you want to spend lesser time in making a solar dryer, then this plan perfectly suits your need. Your ultimate goal of drying veggies and fruits would be fulfilled.
  • Craft a frame – length and width depends upon  your choice
  • Join the sides together  to make a perfect shape
  • Add a door at the front
  • Use trays for support
  • Insert heat  absorber
  • Add cover to the frame
For details, have a look here –Detail plan
 
food dehydrator

2: Passive Solar dryer

In order to make your own food dehydrator, and that even a sophisticated type, here is something that you would like the most. It is made from pinewood and basic covering from aluminum. It may take up a few days to get into shape, or you can take professional help for getting the wood chopped. For details, click here
 
Passive Solar dryer

3: Large solar dehydrator

This is a fantastic plan for preserving seeds long term. In order to have an efficient plan, you need the following items:
  • Sizing of the solar collectors
  • Constructing the basic frame
  • Rooftop (support) and solar mounting
  • Collector downward slope
  • Air vents
  • Cooling fans
In order to know in detail see the complete plan
 
Large solar dehydrator

4: Basic solar dryer

This plan helps you in getting the simplest, sun energy efficient diy food dehydrator. You would need the following things:
  • Wood Screws (big and small)
  • Nails
  • Staples
  • Metal Screen
  • Hinges
  • Clear Plastic / Glass
  • Corrugated plastic panel
  • Wood
  • Black Paint
For making the legs you need:
  • Wooden Post
  • Corks from Bottles
  • Link Chain
  • Bolts
For more details, click here
 
Basic solar dryer

5: Thin Plywood Solar dehydrator

This plant belongs to the category of the best food Dehydrators as it is highly functional, yet consumes less time in making. You will need the following materials:
  • Plywood ( for making the body)
  • Wood for braces (support)
  • Window
  • Screen (as cover for vents)
  • Stalking for drying racks
  • Hinges
  • Screws
  • Staples
  • Thermometer
In order to know about the process exactly, go through the complete plan
 
Thin Plywood Solar dehydrator

6: Workable solar dryer plan

Make your life simple by working on the simplest type of solar dryer idea – it is more like a book with a front covered with plastic sheets and base made from the wood. The basic mechanism goes the way it is for every type of Solar dryer, but the outlook is why elephants and sophisticated. In order to know about the details and exact measurements, have a look:
 
Workable solar dryer plan

7: Inexpensive solar dryer

The basic outlook of this kind of solar plan is slanted, which looks more like a vertical garden placed. It is simply the best-looking plan that you would have come across. It has various slabs that would help you in getting multiple items dried simultaneously. For details about the material and constructing, click here
 
Inexpensive solar dryer

 8: Solar dryer with Chimney

By now you must be cleared enough on how to make a food dehydrator – if you want to put your hands in a project that is a little challenging, you must go for this solar dryer plan which has chimney along. It would be fun making this type, if you know how to make the simplest ones.
The link given below would help you in giving the details about how the plans go about. The video link would help you in actually witnessing the entire process.
http://www.youtube.com/watch?feature=player_embedded&v=8XID-nxU5K0
Enjoy making your own solar dryer and make your life easier.

Source:
http://theselfsufficientliving.com/8-free-diy-or-homemade-solar-food-dehydrator-making-plans/

Wednesday, April 6, 2016

You Can Survive!

We are surrounded by modern conveniences, so much so that we take most of them for granted, until we don't have them. From the knife and fork we use to the more complex machines we have built to serve us such as computers, washing machines and even the car we drive. We have developed a way of life where many think they cannot do without these modern day 'necessities'. Is all the gadgetry we have surrounded ourselves with really 'necessities' or have we let ourselves become victims to so much gadgetry that even a broken pencil cannot be sharpened because the electric sharpener is out of batteries? I'm not against having modern conveniences. They have made life easier. But the individual who will survive cannot become so much a slave to luxuries that they cannot do without them. There have been people who have died because they have lost all their modern gear in some outdoor activity because they could not escape the mentality that they were lost without it. It is a fact that disillusionment and the paranoia that follows it are the biggest killers among people thrust into a survival situation.
History bears out what can happen to a people locked into this mentality. Did you know there were people who died on the Oregon trail because they lost their silver forks and spoons and figured they could not eat because they no longer had the tools they were used to eating with? It's true! Many others died when their food supplies ran out because they would not eat the wild game their guides provided because they considered it uncivilized. Even earlier than the Oregon Trail, back to the establishing of the first European settlements in this land, many perished waiting for the supply ships though they lived in a land of plenty. Had it not been for some friendly Native Americans who opened their eyes to nature's bounty and how to make and use the tools they used, the casualties would have been even higher.
In 1989 Hurricane Hugo hit the south-eastern coast of the U.S. and came farther inland than any hurricane on record. Many lives were lost and entire cities were crippled. Most people who lived that far inland never dreamed they could be affected so much by a hurricane. After all, there were hurricanes before and only coastal dwellers needed to be concerned with such phenomena, or so many reasoned, many to their despair. I was amazed at how helpless many people seemed. But there were some, thank God, that would not allow their minds to succumb to the numbness of despair and helplessness and helped out one another, bringing about a sense of community never witnessed before on such a scale. It took a tragedy such as Hugo to bring out the best in some people and the worst in others. Unfortunately it takes a crisis to show us what we are made of sometimes.
What about you? Are you a survivor or a potential casualty? Ask yourself, when the odds are against you, what do you do? A true survivor will continue no matter what the odds. He will not look at what he hasn't got and despair, he will look at what he has got and work with it. It is this quality of life that has helped people face survival situations in the past and gave them the energy to not only survive but also live a life with meaning. Too many have forgotten or never learned what a blessing it is to simply live. Groping for comfort upon comfort will only lead to disappointment and discontent. Knowing how to do with little will make you appreciate what you have whether it be a little or a lot. In a survival situation, whether it be a collapsed economy, stranded in the wilderness or whatever the case may be, will demand courage, determination and perhaps something more. But the power is within us all to overcome our 'impossible' odds and rise above them victorious. You are capable of much more than you probably give yourself credit for. Learn to dig deep within. Draw from that well of spiritual power that is within us all. You can survive!
Survival Basics - An Introduction
As much as is possible, plan ahead. Train yourself in the skills you think you will need. Challenge yourself by testing what you know under controlled circumstances and try to see the flaws in your skills. As much as is possible, prepare. Don't wait until you are thrust into a situation and then have to learn or wish you would have took the time to learn. I always caution all my students that just because they have taken a survival course or read a book on survival or watched a TV show on survival doesn't mean they should go out like an expert and think they can survive. Take time to master your skills. I suggest you train yourself by doing things like take matches with you camping but also take a bow and drill fireset. Try to make fire without matches during your trip but if you can't then you have your matches to fall back on. Take your tent but build an emergency shelter and stay in it instead. Use your tent if you have to though. Maybe even set up a modern camp then strike out, set up a survival camp and use it, that way you have a backup if you need it. Always be safe. Test your skills little by little. Allow yourself to experience survival skills. Take some classes in survival skills. Then when you are ready you and some fellow 'survivors' try it on your own. Never purposely endanger yourself. Always have a back up plan and inform others where you will be and what time to expect you back. That way a search party will know where to look should things go badly.

You may be surprised how little it really takes to enjoy the outdoors. You will find you don't need the entire outdoor store catalog on your back to enjoy yourself. In fact that is kind of what got me interested in survival skills. I was part of a camping organization as a boy. They took a group of us camping and we were so loaded down with so much stuff it was unreal! I quickly learned that the more skills I had, the less stuff I needed.
Survival Basic Attitudes
Are you an outdoorsman? No matter how experienced an outdoorsman you may be... you could become lost in the woods. It could happen to anyone. Daniel Boone, famous pioneer, even got lost. He wouldn't admit it though. His words were, "I've never been lost but I was a might bewildered for several days." You could be out in your canoe or boat and get overturned, losing all your gear. What would you do? It seems to be in the news almost daily, some family, individual or scout-type group strike out into the wild and get lost or injured or caught in the dark. Most are not prepared. Families out on a day hike get off the trail and become lost with inadequate supplies. Many people have died from exposure, when something as simple as being able to build a fire without matches or constructing a simple debris shelter could have saved their lives. Mother Nature is unforgiving but she is also no respecter of persons and will yield her resources to anyone who knows how to access them.
Many outdoor enthusiasts, perhaps most, are so dependent on their modern gear that they would be lost without it. Modern outdoor conveniences make recreation in the outdoors very pleasurable, but the wise person will have a backup plan. Taking a survival skills course and a first aid course from an experienced teacher is a wise thing to do, for nothing can replace hands-on experience for learning lifesaving skills. I teach survival skills courses, but I remember when I first tried to build a bow drill fire by reading a book on the subject with no success. It was not until an experienced teacher had shown me what I was doing wrong that I successfully could go into the woods and with nothing but what was around me construct a bow drill and build a lifesaving fire. I have had readers though that have written and told me that they were able to build a bow and drill fire from the instruction I gave in my articles and books. I do try to write from experience and try to think about what I would like to be told if I were the student.
I shall attempt to explain what I consider some of the basics of staying alive in a survival situation in this article. My approach in this article is more or less written from the assumption that all modern gear is lost. In such a situation you must survive with only what nature can provide.
Survival Priorities and Basics
The first thing to remember, if thrust into a survival situation, is to remain calm. Panic has lead to death in many situations, for one cannot think clearly with the anxiety brought on by simply not calming yourself and using your head. In fact statistically, Panic is the number one killer in a survival situation. Exposure is number two. Bill Gingrass, a fine outdoor survival and primitive skills instructor, came up with a good way of reminding yourself of this, remember the acronym S.T.O.P. Stop, Think, Observe, Plan. STOP, don't wander around. Sit down, calm yourself. Do whatever you have to do to get control of the situation. If you've planned ahead, informed someone of the trail or water you intended on travelling and the time you plan on returning, they will know to send someone if you don't show up at the appointed place and time. Rely on the knowledge and skills you have, you can survive! THINK, assess the situation for what it really is, not what your panicked mind is magnifying the situation to be. OBSERVE, look in your pockets and look around you at what you have that would be useful. Do you have a pocket knife? A pocket knife is much more practical than a large sheath knife and can accomplish most tasks. Even a good-sized sapling can be brought down with a pocket knife if the sapling is bent and cut on the tension side of the bend. Do you have a canteen on your belt or a survival kit? Survival kits are good, if they are well thought out and remain on your belt where they cannot become separated from you.
Most kits on the market are sadly lacking, especially the type found in the hollow handle of so-called 'survival knives', made famous by Rambo. Hollow handled knives were originally designed to contain dehydration tablets and the 'saw' on the back was never designed for sawing wood, but ripping out an opening in the fuselage of a downed plane. Hollow handles make a knife easy to break because the tang doesn't go far enough into the handle. PLAN to stay alive. What are your priorities? You must plan on staying a long period of time, even if it so happens that you are rescued quickly. Set up a permanent camp, don't try to find your way out, unless you know where you are going and it will not require more energy than you have to give and can supply yourself for such a trip.
Consider how long it is till sunset. Don't get caught unprepared in the dark. The darkness changes everything. Temperatures can drop rapidly. You can't see as well. Nocturnal animals that have superior night vision come out at night. In a survival situation you become just another part of the food chain. Depending on how you use your brain and survival skills you have acquired will determine how high on the food chain you remain.
How do you determine how long it is till sunset? Hold up your hand in front of you in your line of sight placing your four fingers just under where the sun appears on the horizon. Move your hand downward to a position just under where your hand was before, counting how many hands and/or fingers down to the horizon. Each hand is an hour, each finger is 15 minutes. This will give you a rough estimate and will vary depending on your hand size. Test this method before you get in a survival situation to your hand size versus timing with a clock. Then you will have a more accurate idea of how accurate your measure is.
As soon as possible, signal in some manner. Three is the universal distress signal, whether it is three gun shots, three fires or whatever the case may be. If you do decide to hike out clearly mark your trail so searchers may track you easily. Why not just bring a cell phone for calling 911? Never count on a cell phone in the wilderness where there may be no towers to even get a signal. Sometimes travelling down the road it is hard enough to get a signal much less in the wilderness.
Your top four priorities, in order of importance, are as follows: SHELTER, FIRE, WATER, then FOOD. Why this order? Most people that die when thrust into a survival situation die of exposure, not hunger or thirst. Hypothermia, one condition of exposure, is the condition of the body when it is losing or has lost heat quicker than it can produce it. Hypothermia can occur at 50 degrees F believe it or not. Hypothermia at 50 degrees F usually happens when one has fallen into the water and suddenly their body loses heat unexpectedly. If you do fall into the water try to remember to ball up into a ball, drawing your knees close to your chest allowing your body to adjust to the temperature of the water before you swim out. Symptoms of hypothermia are uncontrollable shivering (early stages), redness of the skin, numbness, usually in the extremities, such as toes, fingers, hands and feet, slurring of speech and lack of concentration. In advanced cases there is no shivering and the person is usually incoherent. You must get the victim of hypothermia warm as quickly as possible. If you are with someone in this condition, and you are lucky enough to still have a sleeping bag, crawl into the sleeping bag with them with bare skin to skin contact.
Even if you don't have a sleeping bag shelter yourselves somehow, out of the wind and insulate yourselves in some manner, with natural debris or some material and do the same. Build a fire as soon as possible. In some situations, such as this, the fire may actually take a higher priority than shelter, acquiring shelter as soon as possible. If a person is in advanced stages of hypothermia no matter how warm a blanket or sleeping bag they have it will not help. In this state the person's body is not producing enough heat to preserve by insulating them. You must warm the person. Warm liquids and a heat source are what is needed. If not treated early the victim will eventually experience frostbite and will begin to have blackening of the extremities, such as toes, fingers, ears and nose followed by entire limbs and will eventually lose the use of these body parts. The body will preserve the core (heart and brain) above other body parts in an attempt to stay alive.

Hyperthermia is the opposite of hypothermia. Hyperthermia is when the body becomes overheated. Sometimes the dangers of heat are underestimated. In the summer of 1980, a severe heat wave hit the United States, and nearly 1,700 people lost their lives from heat-related illness. Likewise, in the summer of 2003, tens of thousands of people died of the heat in Europe. High temperatures put people at risk. People that are particularly susceptible to heat are infants, people age 65 or older and those who are obese. People suffer heat-related illness when the body's temperature control system is overloaded. The body normally cools itself by sweating. But under some conditions, sweating just isn't enough. In such cases, a person's body temperature rises rapidly. Very high body temperatures can damage the brain or other vital organs. It's like having a fever. Several factors affect the body's ability to cool itself during extremely hot weather. When the humidity is high, sweat will not evaporate as quickly, preventing the body from releasing heat quickly. Other factors that can cause hyperthermia are dehydration, alcohol use and certain drugs. Hydration is so important in hot or cold conditions.
Two common problems of hyperthermia are heat exhaustion and heat stroke. Heat exhaustion usually occurs before heat stroke. Heat exhaustion is the body's response to an excessive loss of water and salt contained in sweat. A person suffering from heat exhaustion may be sweating profusely. The skin may even be cool and moist. The victim's pulse rate may be fast and weak, and breathing may be fast and shallow. If heat exhaustion is untreated, it may progress to heat stroke. Heat stroke occurs when the body becomes unable to control its temperature. The body's temperature rises rapidly, the sweating mechanism fails, and the body is unable to cool down. Body temperature may rise to 106°F or higher within 10-15 minutes. Heat stroke can cause brain damage, permanent disability or even death if emergency treatment is not given. Symptoms of heat stroke include high body temperature (above 104°F), reddening of the skin, no sweating, a rapid pulse, a throbbing headache, dizziness and in extreme cases nausea, confusion, seizures, unconsciousness and death. What should you do if you or someone experiences hyperthermia? First of all catch it as early as possible. Get the victim cool. Get them into the shade. Immerse them in water if you can. Even soaking the clothing with water will help. As the liquid evaporates it will take away heat from the body. Fan them. Do not allow consumption of alcohol. I know certain TV shows show the survivalist drinking urine for emergency water. Urine will actually dehydrate a person further as will drinking alcohol and blood. Soaking the clothes with alcohol or urine would be a better use. The evaporation process from the clothing can help cool the body. And of course, get medical attention as soon as possible.
Be resourceful. Be creative in a survival situation. Think. The life you save may be your own or someone close to you. Control your circumstances as much as is possible. Don't let things get out of control. Think ahead. You can survive!
Want to know more about survival? Purchase Raven's book CAN YOU SURVIVE? Well illustrated and comprehensive information on survival. Benjamin 'Raven' Pressley is a prolific writer on a variety of topics. He is also an author of many books available in paperback and Kindle. He also has many free blogs to read as well as audio to listen to. For the book CAN YOU SURVIVE? as well as many resources and services he offers be sure to visit his website at http://www.WayoftheRaven.net
 
Article Source: http://EzineArticles.com/expert/Benjamin_Raven_Pressley/2225443

Books of interest:

Monday, April 4, 2016

Mother Nature’s Best Home Remedies

Home remedies, or natural remedies, are typically grown in the comforts of your own backyard, or for many the comfort of the wilderness. Medicinal plants and oils have been know to serve as remedies for ailments both major and minor. They are Mother Nature’s healthy alternative to conventional medicine, and have been used longer than we can imagine. Even the ancient Egyptians utilized these home remedies!
If ever left without modern medicine, knowing a little about nature’s remedies for common ailments could prove crucial to your health and wellness in a survival situation.
We’ve gathered some essential medicinal plants and oils, and their cures, that you should have on hand for your next home remedy.

10 Medicinal Plants


Great Burdock
This root is used to treat ‘toxic overload’ that result in throat infections and skin diseases like : boils, rashes, burns, bruises, herpes, eczema, acne, impetigo, ringworm and bites.
Marsh Mallow
This root internally treats: inflammations and irritations of the urinary and respiratory mucus membranes, counter excess stomach acid, peptic ulceration, gastritis. Externally, the root is applied to bruises, sprains, aching muscles, insect bites, skin inflammations and splinters.
If you miss making s’mores when STHF – this is also the plant marshmallows are made from!
Aloe Vera
The sap from Aloe Vera is extremely useful to speed up healing and reduce the risk of infections associated with wounds, cuts, burns, eczema, as well as reducing inflammation.
Aloe Vera taken internally may treat: ulcerative colitis, chronic constipation, poor appetite and digestive problems.
Pot Marigold
Pot Marigold is a great remedy for skin problems, including bites, stings, sprains, wounds, sore eye and varicose veins.
Internally it may treat fevers and chronic infections. The tea of the petals tones up circulation and, taken regularly, eases varicose veins.
Gotu Kola
This plant acts on various phases of connective tissue development and stimulates healing of ulcers, skin injuries, decreasing capillary fragility, stimulation of the lipids and protein necessary for healthy skin.Crushed leaves are poulticed to treat open sores. It can also be used to treat leprosy, revitalize the brain and nervous system, increase attention span and concentration and treat venous insufficiency.
Camomile
In addition to aiding problems with the digestive system, it has a soothing and calming effect like aromatherapy, used to end stress and aid in sleep. The herb is also used to treat common aches like toothache, earache, shoulder pain and neuralgia.
Chinese Yam
It is sweet and soothing to the stomach, spleen and has a tonic effect on the lungs and kidneys. Internally, it treats tiredness, weight loss, loss of appetite, poor digestion, chronic diarrhea, asthma, dry coughs, uncontrollable urination, diabetes and emotional instability.
Externally, it may be applied to ulcers, boils and abscesses.
Echinacea
The echinacea has the capacity to raise the body’s resistance to bacterial and viral infections by stimulating the immune system. It also has antibiotic properties that helps relieve allergies. Basically, the roots are beneficial in the treatment of sores, wounds and burns. It was once used by the red indians as an application for insect bites, stings and snakebites. The echinacea grows on any well drained soil, as long as it gets sunlight.
Great Yellow Gentian
This root is a bitter herb used to treat digestive disorders and states of exhaustion from chronic diseases. It stimulates the liver, gal bladder and digestive system, strengthening the overall human body. Internally, it may treat liver complaints, indigestion, gastric infections and aneroxia.
Siberian Ginseng
This herb is a powerful tonic herb that maintains good health. It’s medicinal properties are used for menopausal problems, geriatric debility, physical and mental stress, and treats bone marrow suppression caused by chemotherapy or radiation, angina, hypercholesterolemia and neurasthenia with headache, insomnia, poor appetite, increasing endurance, memory improvement, anti-inflammatory purposes, immunogenic purposes, chemoprotective purposes and radiological protection.(See full article at Backyard Garden)

Who knew weeds were good for something? Check out these 10 weeds and their healing properties:


Medicinal Plant Oils | Essential Oils

Chances are you’ve heard of essential oils, which are oils extracted from medicinal plants. Here are a few or our favorite essential oils we are sure to keep readily available in the medicine cabinet:

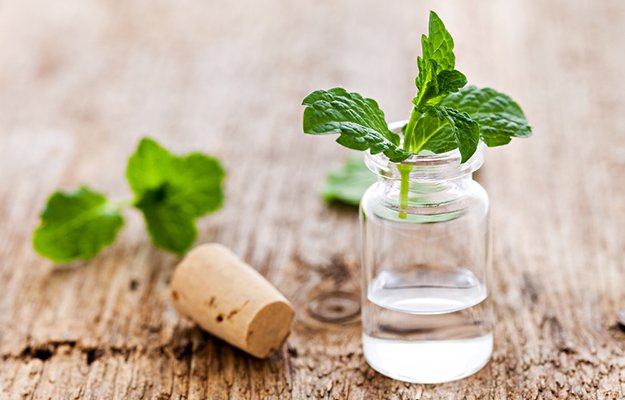
Peppermint Essential Oil

peppermint-essential-oil

Peppermint is nicknamed ‘the world’s oldest medicine’, with archaeological evidence placing its use at least as far back as ten thousand years ago. Peppermint is naturally high in manganese, vitamin A and vitamin C. Crushed leaves rubbed on the skin help soothe and relax the muscles. Peppermint oil is most commonly used for:
  • reduce irritable bower syndrome
  • against upset stomachs
  • inhibit bacterial growth
  • treat fevers
  • flatulence
  • spastic colon
  • nausea
  • headaches
(Read more at Fractured Paradigm)

Sage Essential Oil

sage-essential-oil

Sage is one of our favorite oils. It has many diverse health benefits including:
  • Stomach pains
  • Coughs
  • Cramps
  • Eliminates scars
  • Purifies blood
  • Digestive aid
  • Reduces fever
  • Stimulates the brain
(See more health benefits at Organic Facts)

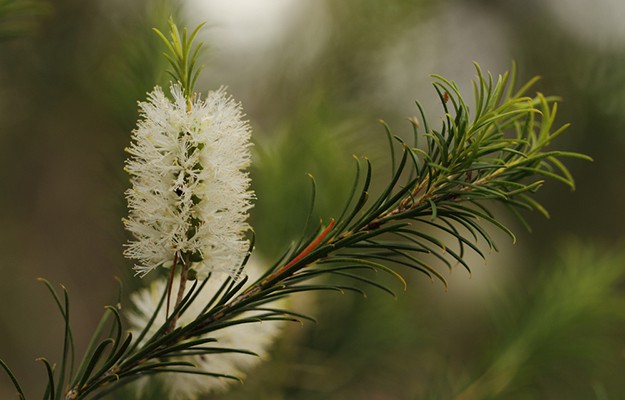
Tea Tree Essential Oil

tea-tree-essential-oil
Tea tree oil is often referred to as “medicine cabinet in a bottle,” as it’s remedies are seemingly endless. Check out these 79 uses for the ultimate survival remedy:
  1. Abrasions and minor cuts
  2. Acne
  3. Air freshener
  4. Allergies
  5. Arthritus
  6. Asthma
  7. Athletes foot
  8. Baby care
  9. Bacterial infections
  10. Bad breath
  11. Bladder infection
  12. Blisters
  13. Boils
  14. Bronchial congestion
  15. Bronchitus
  16. Bruises
  17. Bunions
  18. Burns
  19. Calluses/corns
  20. Canker sores
  21. Carbuncies
  22. Chapped lips
  23. Chicken pox
  24. Chigger bite
  25. Cold sores
  26. Coughs
  27. Dandruff
  28. Dermatitus
  29. Dry skin
  30. Eczema
  31. Emphysema
  32. Flea bites
  33. Gout
  34. Gum disease
  35. Head lice
  36. Hives
  37. Homemade mouthwash
  38. Household cleaning
  39. Immune system
  40. Infected wounds
  41. Inflammation
  42. Ingrown hair
  43. Insect repellant
  44. Jock itch
  45. Laryngitis
  46. Laundry helper
  47. Mildew/mold remover
  48. Mosquito bites
  49. Muscle aches/pains
  50. Mumps
  51. Nail fungus
  52. Pest control
  53. Plantar warts
  54. Psoriasis
  55. Rashes
  56. Rheumatism
  57. Ringworm
  58. Rubella
  59. Scabies
  60. Sciatica
  61. Seborrhea
  62. Shingles
  63. Shock
  64. Sinusitis
  65. Sore muscles
  66. Sore throat
  67. Staph infection
  68. Stye
  69. Sunburn
  70. Tattoos
  71. Thrush
  72. Ticks
  73. Toenail fungus
  74. Toothbrush cleaner
  75. Tonsillitus
  76. Vaginal infection
  77. Viral infections
  78. Warts
  79. Wounds
(See how to apply tea tree oil to these ailments at LA Healthy Living)

There are an endless array of medicinal plants and essential oils. Let us know what other home remedies you are using in the comments below!

Source:
http://survivallife.com/mother-natures-best-home-remedies/

Pencil Sharpener Survival Tool

A pencil sharpener might not seem like something you should keep in your survival kit, but it&rsquo;s actually quite useful. The paper-thin shavings that you can make catch fire easily and make great tinder.
A pencil sharpener might not seem like something you should keep in your survival kit, but it’s actually quite useful. The paper-thin shavings that you can make catch fire easily and make great tinder.
 
Source:
 
 
#1 BEST Fire Starter - SurvivalSPARK Emergency Magnesium Fire Starter - Survival Fire Starter with Compass and Whistle

Light My Fire Swedish FireSteel 2.0 Army 12,000 Strike Fire Starter with Emergency Whistle - Orange