});

Saturday, January 7, 2017

Five Ways to Preserve Eggs


preserving eggs, 5 ways to preserve eggs
preserving eggs
From The Source:
Boil ’em, bake ’em, freeze ’em and more… I have an abundance of fresh eggs and they just keep coming. It’s that time of year, of course, the chickens are working overtime! My friend sells them to me for $2 dollars a dozen and they are so good I just can’t pass them up. I currently have five dozen eggs and more on the way. I’m on a mission today to find ways to preserve my egg abundance. 5 ways to preserve eggs | PreparednessMamaRaw eggs will last about 30 days in your refrigerator without losing any quality. We will probably eat this 5 dozen eggs in 5 weeks, but it takes up a lot of space in my frig. So I’m looking for alternative ways to save, freeze and extend the bounty. Before you begin to preserve your eggs always do a float test before using it. Just fill a bowl with cold water and place your eggs in the bowl. If they sink to the bottom and lay flat on their sides, they’re very fresh. If they’re a few weeks old but still good to eat, they’ll stand on one end at the bottom of the bowl. If they float to the surface, they’re no longer fresh enough to eat.

Floating = spoiled.

Read On Here


Portable Solar Cooker

Friday, January 6, 2017

14 Survival Tips That May Save Your Life Someday Vol. II

survival tips
homemade arrow

In the case of an emergency, doing the right thing or having the right skill could make the difference between life and death, it can save your life or someone else's life. We have compiled a collection of some of the most crucial information and skills you should have to know what to do in an emergency or a disaster. It's really important that you and your family and your friends to have this knowledge.
More from the source

Thursday, January 5, 2017

Kentucky Bourbon Beef Jerky

beef jerky, Kentucky Bourbon Beef Jerky
Kentucky Bourbon Beef Jerky


Looking for a rough and tough beef jerky made for a REAL man? You just found it. Bourbon + Beef Jerky = A Super Manly Beef Snack!
When I think of Beef Jerky, I think of a meat snack that is made for the rough and tough man. I eat most of my jerky while working on a drilling rig in South Texas. It just feels right tearing into a dried tough piece of meat in order to give you enough protein to make it through the day.
I don’t know about you, but what is more manly than making your beef jerky with bourbon? Nothing, that is the obvious answer to this question. Here's The Recipe

Wednesday, January 4, 2017

How to Prepare Acorns for Food and Medicinal Uses

Acorn, Prepare Acorns for food and medicinal uses
Acorn
Acorns represent one of the biggest (and most widespread) calorie jackpots in the annual wild plant food harvest, if you can beat the squirrels to them. These high calorie nuts were a staple crop to many of our ancestors around the Northern Hemisphere and we can still rely on them for food today. Coming in at 2,000 calories per pound, this abundant of a food crop is too valuable to ignore. You can even use them to make medicine. Here’s how.

Tuesday, January 3, 2017

How To Dry Meats, Fruits & Vegetables In A Car

How To Dry Meats, Fruits & Vegetables In A Car
dehydrating meat


How To Dry Meats, Fruits & Vegetables In A Car

Drying is one of the oldest techniques used by man to preserve food. Native Americans would dry strips of elk, buffalo and rabbit in the sun. Later, the American pioneers dried their meat by draping it on the side of their wagons on their days-long trips. Today we have access to ovens and dehydrators, which saves time and effort…but it’s still important to know and learn the skills of harnessing the sun’s heat for our advantage, especially when it comes to food.
Unfortunately (but fortunately for other reasons), temperatures reach above 100 degrees only in few places across the United States, making it tough to use the sun alone to dry meats, fruits and vegetables. Without high temperatures, what’s there to do?

Using A Car As A Dehydrator

Even on a relatively cool day, the temperature of the inside of a car can swell to over 100 degrees. At 70 degrees, after about half an hour, the inside of a car can reach an average of 104 degrees. After an hour, it can go up to 113 degrees. That’s 40+ degrees of added heat, which is crucial when you’re trying to dry meats, fruits or vegetables outdoors…especially with a limited amount of time. If temperatures outside of the car reach up in the 90’s, the inside can produce some sweltering heat perfect for dehydrating.
All you gotta do is thinly slice your meats, fruits and vegetables and place them in your car…more specifically on the dashboard, where the sun hits directly. After a few hours or days, you should have nicely dehydrated food, ready for storage or consumption! Not only is it easy—it’s cheap, saves energy and money and is a great skill to know.
Check out below for more info.

Dry Meats, Fruits & Vegetables In A Car

Drying Meat In The Car

  1. Thinly slice your meat and season it with salt, which helps the preservation process.
  2. Arrange the meat on a few cooling racks and place them across the car’s dashboard. Make sure the front window of the car is in direct sunlight for the majority of the day.
  3. Close the car doors but open the windows just a tiny bit so that moisture can escape the car.
  4. Let the meat sit in the car for 5 to 6 hours, flipping it over every couple of hours or so.
  5. Remove and place in an airtight bag.
beef jerky
image via Driven Dotty

Drying Fruits In The Car

  1. Pick fruits and vegetables that are at peak ripeness. Apricots, plums, strawberries, tomatoes, peaches, berries, pumpkin, corn, celery and greens are just some of the better options. Really though, you can dehydrate pretty much anything.
  2. Wash and then either quarter or slice the fruits/vegetables into 1/6 inch thick pieces.
  3. Place the fruits/vegetables in a cardboard box or on a flat baking sheet and put it on the car’s dashboard.
  4. Let the fruits/vegetables dry for a day or two. How long it takes all depends on the temperature. Check on it every few hours to make sure the fruit doesn’t get cooked.
  5. When done, store the dried fruits/vegetables in an airtight container and keep them somewhere cool.
dried fruit
image via The Tangled Nest

Bonus: Drying Herbs In The Car

  1. Remove the leaves from the stems and toss them all over a baking sheet or piece of cardboard.
  2. Place the herbs on the car dashboard and let them sit for anywhere between an hour to a couple of days.
  3. Preferably you want the car temperature to be at 105 degrees or lower so that the herbs don’t lose their nutritional content. Be vigilant and check on the herbs every few hours.
  4. Once they’re done, remove them and store them in a ziplock bag.
herbs-drying-in-car
image via Up Pastured Farms
Source:
https://survivallife.com/drying-meats-fruits-vegetables-car/

Friday, December 30, 2016

Don’t Fall for the Prepper Fantasy

Prepper Fantasy
Prepper Fantasy
Don't fall for the prepper fantasy
Prepper Fantasy 1

Print Friendly
4.11/5 (53)
There are so many thoughts and beliefs around what our own personal TEOTWAWKI reality will look like. Every prepper I talk to about any subject has their own take on what will happen, when it will happen, how bad it will get and in what order the chaos will or won’t descend into their world. I think that is natural and shows how we each have our own thoughts and creativity. Often these different perspectives are helpful to me by making me consider other points of view that maybe I had overlooked.
  
Each prepper has to take the facts as we see them and apply our own set of experiences, bias and guiding principles to any potential outcomes we foresee. Nobody can tell the future, so the best we have is history, combined with some individual common sense that hopefully leans on lessons from real history to tell us what to prepare for and guide us toward what we might expect. What each of us is actually faced with may be exactly what we anticipated, or it could be completely different. The trick is to not let a surprise do you in.
I think a lot of people have a best case scenario view in their minds of how the world is going to end and how they will fare through the upheaval. I call this the Prepper Fantasy. I don’t mean fantasy in the sense that preppers wish for events like this, but if something bad is going to happen, this is what they view as maybe the more ideal scenario. It goes a little something like this.
  1. There is a global EMP or Financial Collapse or Pandemic that kills 90% of the world’s population in about 1 year.
  2. The Prepper will have plenty of supplies and survival seeds to keep them alive. The garden will be started right after the catastrophe and they will hunt and fish for food all day long because they no longer have a 9-5 job to go to. They also have guns and plenty of ammo to keep the bad guys out of the house.
  3. After the huge die off, the prepper will begin the task of rebuilding society with some incredibly talented friends (doctors, ex Special Forces, nuclear engineers, etc.) They will be able to barter for just about anything they need either with supplies they have or goods they are able to produce. The lack of money or banks won’t impact them.
  4. This New World will be populated only with people who were smart, good-looking and tough enough to have survived through the bad times and we will be so much better off. Oh, and all of the women will wear leather bras and very tight pants. And they will have Ninja skills too.
Sounds like the outline of a movie plot doesn’t it? One of the many problems I see with this view is the timeline itself. While a global pandemic could make the rounds of the planet in under a year (see Spanish Influenza) there would need to be a lot of other things that fall nicely into place for this Prepper Fantasy to work out. Continue reading from the source...

Thursday, December 29, 2016

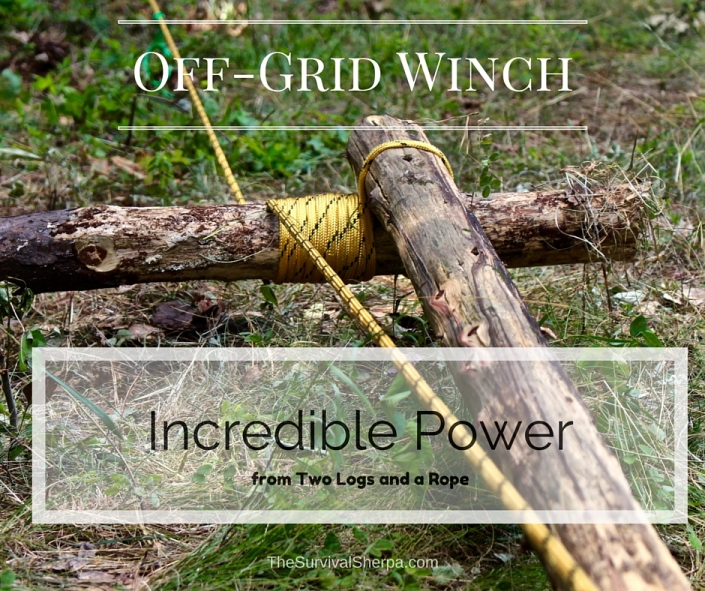
Off-Grid Winch: Incredible Power from Two Logs and a Rope

Posted on by Survival Sherpa
by Todd Walker

The power of simple machines, smartly employed, are capable of moving most anything. Over the years I helped my daddy move really heavy stuff in his plumbing/welding business and on our farm. He once moved and installed a new 3,000 gallon metal water tank at our elementary school using only ropes, pulleys, and levers… by himself.
Daddy didn’t possess superhuman strength, he simply understood the power of simple machines.
Give me a lever long enough and a fulcrum on which to place it, and I shall move the world.
Archimedes
Homemade Winch, Off Grid Winch
Homemade Winch

I first discovered this ingenious flip-flop winch from a YouTube demonstration by Mors Kochanski, the Godfather and author of Bushcraft. A search of flip-flop winches on YT will garner several clips demonstrating the power of using two logs and some rope. So why would I add my video to mix? Because it’s only theory until you put it into action by Doing the Stuff!


The flip-flop winch combines two simple machines, lever and pulley (wheel and axle), as a force multiplier to free vehicles stuck in the mud, safely dislodge hang-ups when felling trees, and/or move heavy rocks. I decided to pull my truck up a slight incline in a field.........Read More From The Source.

How To Tan A Hide Using Several Methods

how to tan a hide example of different animal hides
Tanning Hides

how to tan a hide using several methods
Tanning a Hide


 I read a post recently by a guy that had finished tanning a deer hide for his daughter. He said it was a fairly long ordeal (and he probably wouldn’t ever do it again), but it turned out beautifully and he had a picture to prove it. The hide looked very soft and flexible and hung limp like a blanket over the bed. So thanks to “livbucks” from PA. for providing the initial motivation for me to try my hand at tanning a complete hide.


I like the idea of DIY or as I would say, DIOY (doing-it-your-own-self) and I also like the idea of not wasting the hide and am glad to see that there are many other people that feel the same way. I am encouraged to see so many people on websites and forums that are keeping old skills like how to tan a hide alive. Chances are, if you are reading this, you are a do-it-yourself person too.
I mostly hunt public land with Over-the-Counter tags. I usually hunt by myself, but sometimes my wife goes with me. We butcher, wrap and freeze the meat and make our own sausage, ground meat and patties for burgers.

Tanning Hide DIY
Tanning Hide DIY
Raw mule deer hide from hind quarter.
I occasionally tan the hides from hind quarters of elk or deer that have been packed out because it’s always good to have deer and elk hair on hand for tying flies, but I plan on making a rug or blanket from a whole deer or elk hide.
If I ever draw a limited entry tag, I also plan on making my own European style mount of the skull and antlers.
Before I tackle a whole skin, I need to acquire a few more tools, but I will update this post when I get started.
Read more from the source