});

Friday, March 11, 2016

DIY Cinder Block Rocket Stove for under $8

DIY Cinder Block Rocket Stove for under $8

The DIY Cinder Block Rocket Stove is an incredibly simple and efficient way to cook using natural fuel such as leaves or sticks. The beauty of this design is it focuses all of the heat from the fire into one 4″ by 4″ square which is perfect for cooking. Compare this to a traditional camp fire which radiates the heat in all directions. Rocket stoves can also burn much hotter than traditional camp fires because of the constant air flow. As the hot air rises, fresh air is sucked in to replace it which allows the fuel to burn more rapidly.
 
Stovetec Two-Door Deluxe Lite Wood/charcoal Stove
 
For this build you will need:
  • 3 Cinder Blocks
  • 1 H block
  • or a brick and two paivers
  • Metal Grill


Preserve Dried Goods and Store for Up to 20 Years!!


A couple of months ago I was reading one of my favorite magazines, Countryside, and came across an awesome article about oven canning. I had personally never heard of it before, but was intrigued. So I followed the directions step by step and am now addicted (just one of my natural addictions) to preserving dried goods.

Even though store bought dried goods will last for a couple of years, chances are within a certain length of time weavels and other bugs will get into them and they will begin to taste stale. Oven canning these goodies will preserve them for long periods of time, which is awesome for the emergency prepper, like myself.

Here is a rundown for the process of oven canning.

What you need:

Dried goods (rice, pasta, cereal, dried fruit, dried vegetables, dried herbs, etc)
Canning jars of any shape or size
Canning lids to fit the canning jars
Cookie sheet
Paper towel
Water

   Preserving Everything: Can,    Culture, Pickle, Freeze,  Ferment, Dehydrate, Salt,  Smoke, and Store Fruits,  Vegetables, Meat, Milk, and  More (Countryman Know How)

Step 1: Preheat oven to 200 degrees.

Step 2: Place cookie sheet into preheating oven.

Step 3: Fill jars with dried goods, leaving the lids off

Step 4: Place jars on cookie sheet in the oven for 1 hour.

Step 5: Remove carefully from oven. Take a damp paper towel and wipe the mouth of the jar with it. Place lid firmly on the jar.

Step 6: Listen for popping to indicate that the jar has sealed. As in regular canning, not all jars will seal. If the jar does not seal it could be an indication of a bad lid or a bad jar or just plain dumb luck. You can try it again for that jar or be satisfied in knowing that at least your dried goods are kept safe from bugs.

Another little nifty trick for those that do not want to preserve their dried goods for long periods of time, but would like to keep the little critters out is to put bay leaves in their jars and bags of dried goods.
 
Source

Buck Travelmate

Overview

The perfect portable tool for preparing food while camping, picnicking, road tripping, RVing, tailgating, hunting or relaxing anywhere in the outdoors. It slices, dices, spreads and serves. The spreader's flexible blade allows you to easily spread peanut butter, cream cheese, jelly or any other condiment, but is also sturdy enough for slicing bread, cheese, veggies or snack meats. The TravelMate Kit comes with an antimicrobial injection molded sheath that safely and securely stores the Spreader between uses. The Spreader and sheath are dishwasher safe and the sheath's antimicrobial additive helps prevent bacteria growth. The sheath also features a multi-functional stainless steel fork with an integrated bottle opener, can opener, screwdriver and grill scraper for all your food prep needs. It's a kitchen on the go! Made in the USA


Get Yours Today!
TravelMate Kit, Paperstone Handle, Serrated, Plastic Sheath Camping,Hiking,Travel

Conquer the Frontier Like An American Pioneer

                     
There is something remarkable about the American Pioneer.
These are the folks that settled and developed new territories, without previous knowledge of an area.
They not only re-learned essential survival skills, but also how to savor their time and resources using these skills.
We want to take you back to basics, and learn up on these pioneer survival skills you should have up your sleeve.
Here are ten skills that came second nature to the pioneers, and got us where we are today.

1. Gardening


Growing your own fruits and veggies, is not always a piece of cake. You must know the harvest season of each plant, how to read soil conditions, understand how to properly your plants and how to keep away unwanted pests. Check out The Ins and Outs of Up and Down Gardening for essential gardening tips.

2. Seed Saving

seed-saving
Seed saving is a bit of a lost art, but such a beautiful concept. Practicing seed savers are able to see the evolution of a plant over the years, and find out what factors affect the longevity of the seeds.
More importantly, after a harvest, seed saving will help you plant again the following year. Should there be a drought or devastating disaster, this skill could hold the key to continuing your food supply.
See our full article about The Art of Seed Saving.

3. Fire Building

how-to-build-a-fire
Do you know how to kindle? Which materials to collect? How to maintain a fire in the rain? Basic fire skills are essential to your overall survival strategy. Check out A Foolproof Fire Starting Technique for the basics of how to build a fire.

4. Fire Techniques

fire-techniques
A fire is not only good for generating heat, but is a great way to cook food, boil water, and purify water.

5. Home Remedies

home-remedies
Understanding not only what plants are safe, but knowing their medicinal elements can be the difference between life and death. Plants have amazing healing powers and can treat common ailments such as cough, fever, headache, lack of sleep, bites and sores…the list goes on! Check out our article on Mother Nature’s Best Home Remedies.

6. Metal Working

blacksmith
Believe it or not, there are blacksmiths still practicing this ancient skill in many parts of the world. This skill is useful in making tools, weapons, horseshoes or just simple eating utensils. If SHTF, everyone will be knocking on your door bartering for these handcrafted items.
It work does require a good deal of practice and some special equipment, but it’s a skill worth learning and the learning curve is cut a bit if you already know how to weld or do other metal works.

7. How to Build A Shelter

null


Building a permanent homestead will take quite a bit of time and work, but is crucial to making everything on this list a plausible lifestyle, especially for families. Although building a cabin is ideal, we understand sometimes one is stuck in the wilderness in an emergency survival situation. Check out Emergency Shelter DIY for temporary shelter needs.

8. Sewing

sewing
That’s right, sewing. Can you image making everything you own – clothes, hats, bedding, blankets – from scratch? The pioneers did! Knowing how to patch, mend tears, alter hems, or create something from scratch could help you stay warm in the winter and beat the summer sun.

9. Hunting

hunting
It sounds silly, but hunting requires becoming one with the wilderness. Learning how to hit something accurately is just as important as knowing how to stay quiet and listen to what’s around you, as well as tracking wildlife. How else are you going to eat?

10. Foraging

foraging
Foraging is a great skill to have in addition to hunting. We need those essential vitamins and minerals! However, like most things, it requires attention to detail. Have you heard the saying, “White and yellow, kill a fellow. Purple and blue, good for you. Red… could be good, could be dead?” Do not mistake all plants to be edible.
All of these skill sets are essential for any survival situation, especially if there is a disruption in society. These skills can also be used to trade with others to retrieve resources you may not otherwise have access to.
Source

 
Frontier Living: An Illustrated Guide to Pioneer Life in America

Back to Basics: A Complete Guide to Traditional Skills, Third Edition

Thursday, March 10, 2016

Learning the Art of Foraging

I enjoy incorporating locally foraged plants into our daily diets. It supplements, and occasionally replaces, a meal at my house. It also gives me another “tool” in my tool belt of survival skills.

What piqued my interest in this subject and how did it all begin?

After the bank crisis of 2007-2008, I began to think there could be a possibility that our currency wouldn’t be worth anything someday. I wanted an alternative way of providing for my family. If hyperinflation occurred, I may not be able to afford groceries at the store. What could I do?
If I could learn how to find wild edibles, we could be more self-sustaining until things got back to normal. I’ve heard many people say they would just hunt for their food, but what if over 200 million other people are doing the same thing? We would quickly run out of animals.
In addition, a meat-only diet isn’t very appealing, nor is it nutritionally optimal. At the very least, most meals need some herbs and spices! I wanted to learn what plants, trees, shrubs, and flowers could be resources for me.

Learning how to forage

Of course I went online and learned about plants for food and medicine. I talked to my local county extension office and spoke to “experts” in many areas. I found that nobody would teach me about mushroom hunting due to the liabilities. (It’s too easy for newbies, especially, to mis-identify and think a poisonous mushroom is safe to eat.)
I looked for places to go that offered “Hands-on” learning that were free or had a minimal cost. I also wanted to meet local people that had useful skills that were willing to share their knowledge. I especially wanted to meet “my own kind”. I hoped maybe we could form a group and share what we learned.
Around 2010, things started happening. I found an awesome place called Willow Haven Outdoors in Anderson, Indiana that offered a FREE “Skills Day” once per year to showcase survival skills and techniques. I learned how to operate a bow drill, make a grote (fish hook carved from bamboo), observe flint knapping, and making three prong spear to impale fish. I would go down once or twice per year to learn things and buy survival gear. It is operated & owned by Creek Stewart. He now has a show on the Weather Channel called “Fat Guys in the Woods”.
TIP: Read more about the basics of foraging in “August Skill of the Month: Foraging“.
Then in 2012, my friend, Madelynn and I began our own preppers group, North West Indiana Preppers. We wanted to prepare for man-made and natural disasters. We wanted to get a group of people with a variety of skills that could help teach self-reliance. It was awesome to have like-minded people to talk to and learn from. One of our members, John, taught me how to build a solar cooker from a Fresnel Lens from my old TV. Another member, Bill, taught me how to tap Maple Trees, Creek Stewart came and took us into the woods to hunt for Wild Edibles, and many, many more events.
Surround yourself with people smarter and more knowledgeable than you!

Mushrooms

It is very easy to mis-identify mushrooms and eat something poisonous unless you really, truly know what you are doing, which is why it can be so hard to find anyone willing to teach this skill. PLEASE exercise extreme caution if you choose to do this yourself.
I still wanted to mushroom hunt, so I joined the Indiana Mycological Society. (There are regional and state clubs from Mexico to Canada.) I get great information, photos, and advice from them. They also take people into the woods to hunt mushrooms that are in season. Another wonderful resource is Taltree Arboretum in Valparaiso, IN. They have edible plant tours, mushroom walks, and cool gardens. There is a small fee for the guided hands on learning, but it is well worth it.
Probably the most valuable investments are a great field guide and spending time in different types of terrain to locate plants in your book. I always have the Peterson Field Guide to Medicinal Plants and Herbs of Eastern and Central North America by Steven Foster and James Duke in my car. (There is also one for western North America.) It has glossy colored photos accompanied by great descriptions of the plants and their many uses.
Last summer and fall, I spent a great deal of time in the woods around my subdivision, armed with a smart phone and my 
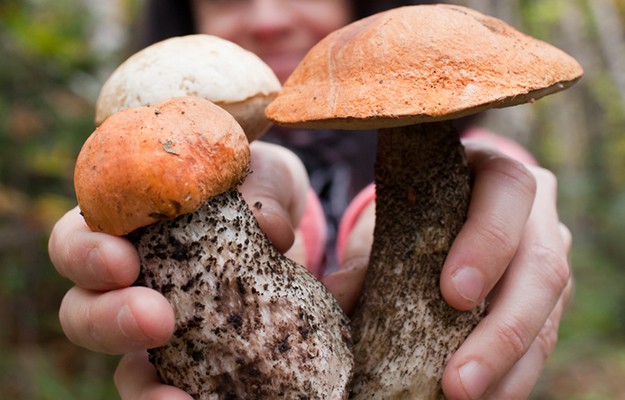
Field Guide. I would pick a mushroom or two, then find a place to sit, study, and photograph my finds. If I felt I could positively identify a mushroom, I would be the first one to eat it. I can’t figure them all out, but I can harvest Sheepshead, Chicken of the Woods, Puffballs, Oysters, Boletes, and an unusual one called Purple-gilled Laccaria.
I learned how to perform a “spore test” when the color of the spore is a critical factor in identification. I would get two of each kind of mushroom, placing one on a piece of black paper and one on white paper. Then I set a drinking glass over each one. In a few hours, remove the glass, and you will see a beautiful spore pattern appear. You need to see the spore color for identification of some mushrooms.
I also deliberately spread the edible mushroom spores in as many locations as I can to increase their numbers. Simply cut a mushroom into a few pieces, and insert the pieces gill side down onto a type of wood that they are partial to, and new mushrooms will grow there.
Be your own “Johnny Appleseed” and plant a few secret gardens in off the beaten path locations using heirloom perennial seeds. If someone takes all your stuff or takes over your property, you still have these little “hidden gardens”.

Insects

For more foraging options, consider insects. There is a reason people in dire circumstances are often seen eating them: We will never run out of insects.
Last summer I served guests dandelion and bacon soup for dinner, and dessert was a delicious protein bar made with CRICKET flour. Cricket flour is 60% protein, and when it’s mixed in with chocolate, peanut butter, coconut, or lime, it’s really good. The company that made these bars is called “Chapul”. You can order them online, but I just wanted to introduce this idea to you, in case you ever need another source of protein. It’s gluten free and doesn’t taste any different than “regular” flour.

Resources All Around

I know my area pretty well. Get to know yours, too. I located walnut and hickory trees, so I have a source for nuts. (These aren’t the easiest nuts to crack, so be prepared with a good nutcracker or two.) I can also use the hickory bark to smoke meat. I’ve found numerous mulberry trees and made syrup, jam, and jelly with some friends. I have apple trees with small sour apples that are great for making apple cider vinegar.
TIP: Take an inventory of the plants in your area. Learn more here.
I know where there are a few creeks not far from me. So, I have a water source, but also found crayfish, and don’t forget, animals need water, too. You can hunt close to the water, eventually, they will all come there.
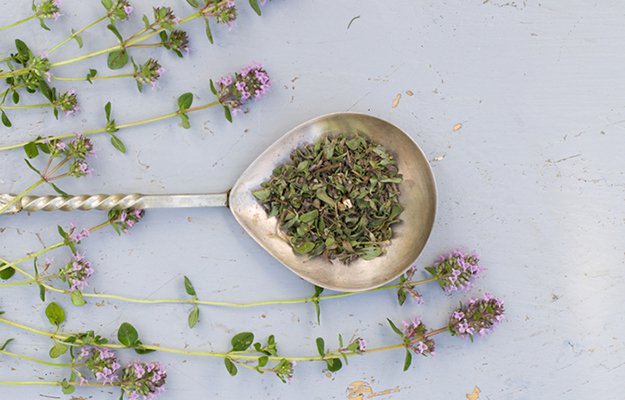
I located raspberry bushes, cattails, wild asparagus, stinging nettles for medicinal tea, dandelion leaves (blanch them and they taste like a delicate spinach), elderberries, I have honeybees, Queen Anne’s lace for making jelly, my maple trees for making syrup, white willow for making salicylic acid (aspirin) in my own yard, and those “Helicopter” type seeds that come from maples are edible (toast them first). There are just too many to list here!

Final Thoughts

When I reflect back on all the weeds I’ve pulled, I can’t believe how many were actually edible plants! My garden was loaded with purslane, lambs quarter and plantain.  I eat the first two while they are still young and tender, and use plantain as a poultice for skin irritation or injuries.
All these amazing resources are probably all around you, and you may not realize it. Start looking and learning now, before anything bad happens.
My main points for anyone wanting to learn about foraging are:
. It’s never too late to start. Learn at least a few new things.
. Look for resources to help you. It can be people, books, groups, or the internet.
. But be prepared to learn by yourself if no one else is interested.
. Learn to identify local wild edibles (plants, trees, nuts, herbs, mushrooms).
. Learn to prepare these items and eat them.
. Become the Resource Person.


The Forager's Harvest: A Guide to Identifying, Harvesting, and Preparing Edible Wild Plants

Foraging: For Beginners - The Ultimate Guide To Foraging Wild Edible Plants And Medicinal Herbs For Optimum Health and Longevity! (Homesteader Book, Foraging, Wildcrafting)

A Field Guide to Edible Wild Plants: Eastern and central North America (Peterson Field Guides)

9 Unusual Uses for Aspirin


It's 6:30 AM and you feel a tightness in your chest. Antacids don't help. Your jaw is tightly set and your arm feels numb. Heart attack? Or is it an unreasonable response to a new zit? Either way, aspirin can help.

From heart attacks to zits, in the garden and the laundry room, aspirin has a ton of uses beyond relieving pain. Some of these I've tried, others I should try but haven't, and a few I hope to never try. You, the reader, are left to judge which is which. Read More From The Source


Bayer Aspirin Regimen Low Dose 81mg, Enteric Coated Tablets, 300-Count

Wednesday, March 9, 2016

7 Ways To Get Started Prepping Today

When most people decide that it is time to take charge of there family’s security and preparedness, the first resource that they turn to is the Internet. This can be both good and bad as the entire gamut of the Prepping world is on display all from the comfort of your couch, and the entire Prepping world can be a bit, how to put this delicately. . . Bat Shit Crazy at times. While AR-15’s and EOTechs are cool they might not be of much use during the next Ice Storm or Blackout.

#1 Assemble A Black Out Kit

Whether it is a big storm or a drunk hitting a telephone pole, sometimes the lights go out. A Black Out Kit is set up for when things go dark. It has the stuff you will be looking for immediately: a flashlight (the cheap ones are fantastic for this), some spare batteries, a few glow sticks, a candle, and some matches. I have one in each bedroom, minus the flammable stuff in the kid’s room. A few cheap kits like this will get you through the the short term power outages without ransacking the house looking for light!

#2 Put Together A 72 Hour Kit

A step up on the Preparedness scale but still firmly rooted in Common Sense Preparedness is putting together a 72 Hour Kit. This the sort of kit that sites like Ready.gov have been squawking about for years now. A 72 hour should have enough emergency supplies to get you and your family through those crucial first 3 days following a disaster.
A good basic kit will have:
  • Non-Perishable and easy to prepare food.
  • 3 Gallons of water per family member
  • Emergency Radio
  • First Aid Kit
  • Flashlight and Extra Batteries
  • Blankets. Those Space-Saver vacuum bags make excellent waterproof storage for these.
  • Paper plates and plastic utensils
  • Candles
  • Matches
  • Camp Stove
 

#3 Meet The Neighbors

When it comes to Common Sense Preparedness getting to know your neighbors just make good sense. Neighbors can come together to accomplish a lot in times of disaster. Clearing trees, bringing a load of firewood to the older couple next door, cooking a meal, running an extension cord to the house next door, keeping an eye out for those looking to take advantage of a disaster, or running down to the gas lines together are all good examples of the benefits of a strong neighborhood.

#4 Buy A Generator

Buying a generator is one of the best Preparedness investments you can make. If the lights are out for more than 3 days or so you will be amazed at how much you will crave a little bit of light. A generator just makes everything easier, being able to keep the fridge cold, cook a meal, and take a hot shower are just a few of the things a generator makes possible.
No matter what kind of generator you get fuel will be a big concern. A generator without fuel is just a very large paperweight. Having a few days worth of fuel on hand is a good level to strive for. During Hurricane Sandy the Northeast was hit with crippling fuel shortages and long gas lines, the likes of which haven’t been seen since the 70’s, were the norm. 20 or 30 gallons of extra gas and some restraint with the run times could mean keeping the lights on or being forced to stand in line with a bunch of angry irritable people who are just looking for an excuse to lash out.

#5 Get Started On Food Storage

When you mention Food Storage automatically the non-Prepper begins to think of rows and rows of gleaming #10 cans filling a basement. I’m here to tell you that is a noble goal to work towards but I figure that working towards 30 days of food stored is a realistic goal for most people. By using methods like copy canning, shopping sales, and remembering the old adageStore what you eat and eat what you store” you can begin right away to build a deep pantry that will see you through 99% of disasters.

#6 Talk About Prepping With Your Spouse And Family

Getting a spouse on board with Prepping is a lot easier if you have some common sense goals in mind. Saying you would like to dig a bunker in the backyard is most likely going to earn you a glazed over look at best and divorce papers at worst. Having a family that can move forward together is much better than one partner prepping in secret!

#7 Go Camping

Getting the family out of the house and into a tent in the Great Outdoors is still the #1 way to get a family ready to face most short term disasters. Plus a lot of emergency gear is really just re-purposed camping gear. Fancy flashlights and lanterns are easier to get past the significant other if you are actually going to use them. Camping also lets you hone all those short term survival skills that will come in handy in the event of a disaster.

Source

SHTF Prepping:: 100+ Amazing Tips, Tricks, Hacks & DIY Prepper Projects, Along With 77 Items You Need In Your STHF Stockpile Now! (Off Grid Living, ... & Disaster Preparedness Survival Guide)

Tuesday, March 8, 2016

You Don’t Have to Be a Gourmet Chef to Cook With Food Storage

March 7, 2016 By

One of the most common food storage questions, readers ask me, is “what do we do with all those grains and beans you suggest we store in our pantry”. This is a good question and one that I’m sure has been asked by many while facing their buckets of grains and wondering what to do next.
To be honest, when I started doing this, I asked the same, but with the help of several  good books, recipes and a bit of trial and error, I can now whip up a tasty meal from what most people, would think was a bucket of horse feed. It’s not at all difficult, so don’t be intimidated (or afraid to throw out a botched batch of whatever you are making) all you have to do is start.
This is the main reason (aside from saving money) that I stress that you need to use what you store, so you can learn and know how to use what you have when needed. Never stockpile and think you’ll learn what to do with it “when you have to” do it now… You’ll gain confidence and a valuable skill.
Before listing my five favorite recipes here, I would like to suggest three books, that I think will be a great help to you when learning how to use and prepare these basic foods.
The first book is “How to live on wheat” by John Hill this is a great book that I reviewed here. The other two books are by Peggy Layton Cookin’ With Beans and Rice and Cookin’ with Home Storage, these three books will help answer any questions you have about using basic foods from your pantry and are loaded with recipes that you can use in your kitchen.
Below are five of my favorite recipes  using foods from my food storage…

Cooked Pinto Beans

  • 2 cups of beans
  • 8 cups of water
  • 2 teaspoons of salt
  • 2 teaspoons of pepper
  • 1 tablespoon of lard (you can make your own lard)
Sort beans, wash and soak overnight. Beans can be cooked on the stove top, over an open fire or in a Crock-Pot or pressure cooker. Mix everything in an appropriately sized cooker and cook over heat until soft.
If I am going to be home all day I prefer the open fire, gives the beans a unique taste not found with the other methods. The fastest and most convenient way to cook pinto beans is with a pressure cooker.

Pinto Bean Cakes

  • 2 cups cooked pinto beans
  • 1 small onion, chopped
  • 1/2 teaspoon salt
  • 2 tablespoons cornmeal
  • 1 tablespoon flour
  • 1 teaspoon chili powder
Press beans into a paste with a fork and add cornmeal, salt, flour and chili powder. Stir well. Add the chopped onion and mix until well blended. If the mixture is too dry, thin it with bean juice or a small amount of water. Heat a skillet and grease it with bacon drippings, lard or cooking oil. When the pan is hot, drop in the bean mixture by the spoonful and press each bean cake flat with a spoon or spatula. Brown and serve.

Corn and Bean Pone

Grind ½ cup of whole corn and ½ cup of pinto beans to the consistency of flour, combine in a bowl mixing well, add one teaspoon of salt and gradually add ¾ cup of boiling water. Melt enough lard to cover the bottom of the pan with a thin layer of grease, after the pan is greased, pour the mixture into the pan and blend with the grease.
The mix shouldn’t stand more than an inch thick in the pan to start, rising very little during preparation. (To make it rise like cornbread add two teaspoons of baking powder.) Bake at 350 degrees until done. The pone will develop a brown crunchy crust when done. This can also be fried on the stove top, like pancakes. I like to chop up a batch of wild onion and mix with the batter before baking this adds flavor and texture. Also makes a makes a good breakfast – for breakfast don’t add the onions and instead cover with maple syrup or add a little honey.

Wheat Sprouts

Soak wheat in warm water for 24 hours, drain and pour the wheat into a large jar. Cover the mouth of the jar with a thin cloth or screen – sprouting wheat needs oxygen so be sure it can “breathe”.  Flood the jar three or four times a day, draining off any remaining liquid each time.
The wheat will start to sprout in about two-five days depending on the surrounding temperatures – when the sprouts have grown to 1/4 – 1 inch in length they can be used. The sprouts can be eaten raw or dried and ground into a flour then added to recipes and bread. Drying reduces the vitamin content, so I prefer to eat the sprouts fresh.
With sprouts, you can have fresh greens even in winter and they only cost cents per pound. Besides sprouting wheat you can also sprout other seeds and legumes such as sunflower, buckwheat, soybeans, mung beans, alfalfa, clover etcetera.
One of my favorite sprout recipes is from the afore mention “How to live on wheat”  is cooked sprout cereal you’ll need, 4 cups freshly sprouted wheat, cook the sprouts for a few minutes or until they are soft. Add to a large bowl and add salt and honey to taste and cover with warm milk. Makes a nutritious breakfast or midday snack.

Simple Sourdough Bread

To make simple sourdough bread mix the following ingredients in a large bowl:
  • 2 cups whole wheat flour
  • 1 cup sourdough batter
  • ½ cup legume protein complement
  • 1 tsp salt
Knead dough thoroughly and allow to rise to about twice its original height. Bake at 350 degrees for about 45 minutes or until done.
Have you tried preparing food from your food storage? What worked best for you? What did you learn? Let us know in the comments.

Source

A Practical Guide To Keeping Chickens

When I first got chickens, the #1 question that my friends and family asked was, “Do you need a rooster to get eggs?” The answer is no. I usually like to respond with something cheeky, like, “Do you need a man so that you can ovulate each month?” Nope, us ladies do that all on our own. And so do the hens – almost every day.  The only time you would need a rooster is if you want to have baby chickens! Since most municipalities outlaw roosters within city limits, put your dreams of growing a lovely chicken family on hold.
Now, if you are anything like me, I didn’t know much about chickens. I am going to go through just a few of the common terms associated with chickens to get you up to speed.  Some of these may be familiar to you, some might not!

Read More From The Source


Raising Chickens For Dummies

The Chicken Whisperer's Guide to Keeping Chickens: Everything You Need to Know . . . and Didn't Know You Needed to Know About Backyard and Urban Chickens

Mini Encyclopedia of Chicken Breeds and Care: A Color Directory of the Most Popular Breeds and Their Care

Monday, March 7, 2016

Homemade Heated Chicken Waterer

This do-it-yourself poultry waterer is easy to make and will make winter watering chores easier.
Illustration By Nate Skow
                                                                                                                                                                                                                                            This do-it-yourself poultry waterer is easy to make and will make winter watering chores easier.
We have developed a line of poultry waterers, including this heated one you can make yourself. To construct the heated waterer, start with a 5-gallon bucket waterer with poultry nipples (visit Avian Aqua Miser for details). Additional supplies you’ll need include a second bucket, a 3-foot pipe-heating cable (aka heat tape, usually about $25) and duct tape. (Note: This project may not conform to the safety instructions provided by some heat tape manufacturers. —MOTHER EARTH NEWS)
First, cut the bottom off of your extra bucket by starting your hole with the drill, then make your cut with the jigsaw. Remove the handle. Starting from the bottom edge of the bottomless bucket, use a coping saw to make a small slit about 3 inches up the side, then set aside the modified bucket.
Wrap the heat tape around the outside of the unmodified bucket near the bottom, using duct tape to hold it in place. Then push the bottomless bucket onto the bucket waterer, letting the heat tape’s cord feed out of the slit. The bottomless bucket should extend a few inches beyond the bottom of the original bucket waterer.
A last, optional step is to wrap chicken-friendly insulation (such as Reflectix, a foil-backed bubble wrap insulation) around the sides and top of the bucket. Here in Zone 6, the resulting waterer provides frost-free hydration for our flock all winter long. For more information, you can visit our website (given above) and click on “Heated Waterers.”
Anna Hess
Dungannon, Virginia
Source
 
Easy Heat 115 15 Foot Water Pipe Freeze Protection Heating Cable Heat Tape Kit