});

Friday, December 30, 2016

Don’t Fall for the Prepper Fantasy

Prepper Fantasy
Prepper Fantasy
Don't fall for the prepper fantasy
Prepper Fantasy 1

Print Friendly
4.11/5 (53)
There are so many thoughts and beliefs around what our own personal TEOTWAWKI reality will look like. Every prepper I talk to about any subject has their own take on what will happen, when it will happen, how bad it will get and in what order the chaos will or won’t descend into their world. I think that is natural and shows how we each have our own thoughts and creativity. Often these different perspectives are helpful to me by making me consider other points of view that maybe I had overlooked.
  
Each prepper has to take the facts as we see them and apply our own set of experiences, bias and guiding principles to any potential outcomes we foresee. Nobody can tell the future, so the best we have is history, combined with some individual common sense that hopefully leans on lessons from real history to tell us what to prepare for and guide us toward what we might expect. What each of us is actually faced with may be exactly what we anticipated, or it could be completely different. The trick is to not let a surprise do you in.
I think a lot of people have a best case scenario view in their minds of how the world is going to end and how they will fare through the upheaval. I call this the Prepper Fantasy. I don’t mean fantasy in the sense that preppers wish for events like this, but if something bad is going to happen, this is what they view as maybe the more ideal scenario. It goes a little something like this.
  1. There is a global EMP or Financial Collapse or Pandemic that kills 90% of the world’s population in about 1 year.
  2. The Prepper will have plenty of supplies and survival seeds to keep them alive. The garden will be started right after the catastrophe and they will hunt and fish for food all day long because they no longer have a 9-5 job to go to. They also have guns and plenty of ammo to keep the bad guys out of the house.
  3. After the huge die off, the prepper will begin the task of rebuilding society with some incredibly talented friends (doctors, ex Special Forces, nuclear engineers, etc.) They will be able to barter for just about anything they need either with supplies they have or goods they are able to produce. The lack of money or banks won’t impact them.
  4. This New World will be populated only with people who were smart, good-looking and tough enough to have survived through the bad times and we will be so much better off. Oh, and all of the women will wear leather bras and very tight pants. And they will have Ninja skills too.
Sounds like the outline of a movie plot doesn’t it? One of the many problems I see with this view is the timeline itself. While a global pandemic could make the rounds of the planet in under a year (see Spanish Influenza) there would need to be a lot of other things that fall nicely into place for this Prepper Fantasy to work out. Continue reading from the source...

Thursday, December 29, 2016

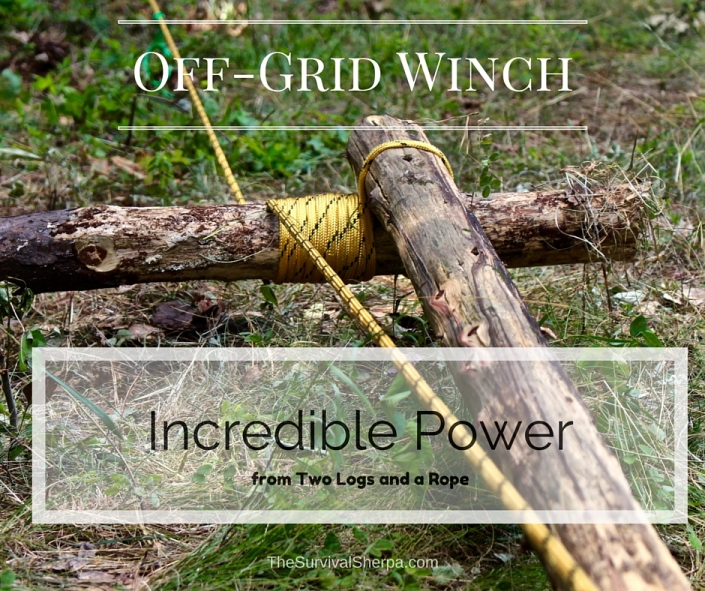
Off-Grid Winch: Incredible Power from Two Logs and a Rope

Posted on by Survival Sherpa
by Todd Walker

The power of simple machines, smartly employed, are capable of moving most anything. Over the years I helped my daddy move really heavy stuff in his plumbing/welding business and on our farm. He once moved and installed a new 3,000 gallon metal water tank at our elementary school using only ropes, pulleys, and levers… by himself.
Daddy didn’t possess superhuman strength, he simply understood the power of simple machines.
Give me a lever long enough and a fulcrum on which to place it, and I shall move the world.
Archimedes
Homemade Winch, Off Grid Winch
Homemade Winch

I first discovered this ingenious flip-flop winch from a YouTube demonstration by Mors Kochanski, the Godfather and author of Bushcraft. A search of flip-flop winches on YT will garner several clips demonstrating the power of using two logs and some rope. So why would I add my video to mix? Because it’s only theory until you put it into action by Doing the Stuff!


The flip-flop winch combines two simple machines, lever and pulley (wheel and axle), as a force multiplier to free vehicles stuck in the mud, safely dislodge hang-ups when felling trees, and/or move heavy rocks. I decided to pull my truck up a slight incline in a field.........Read More From The Source.

How To Tan A Hide Using Several Methods

how to tan a hide example of different animal hides
Tanning Hides

how to tan a hide using several methods
Tanning a Hide


 I read a post recently by a guy that had finished tanning a deer hide for his daughter. He said it was a fairly long ordeal (and he probably wouldn’t ever do it again), but it turned out beautifully and he had a picture to prove it. The hide looked very soft and flexible and hung limp like a blanket over the bed. So thanks to “livbucks” from PA. for providing the initial motivation for me to try my hand at tanning a complete hide.


I like the idea of DIY or as I would say, DIOY (doing-it-your-own-self) and I also like the idea of not wasting the hide and am glad to see that there are many other people that feel the same way. I am encouraged to see so many people on websites and forums that are keeping old skills like how to tan a hide alive. Chances are, if you are reading this, you are a do-it-yourself person too.
I mostly hunt public land with Over-the-Counter tags. I usually hunt by myself, but sometimes my wife goes with me. We butcher, wrap and freeze the meat and make our own sausage, ground meat and patties for burgers.

Tanning Hide DIY
Tanning Hide DIY
Raw mule deer hide from hind quarter.
I occasionally tan the hides from hind quarters of elk or deer that have been packed out because it’s always good to have deer and elk hair on hand for tying flies, but I plan on making a rug or blanket from a whole deer or elk hide.
If I ever draw a limited entry tag, I also plan on making my own European style mount of the skull and antlers.
Before I tackle a whole skin, I need to acquire a few more tools, but I will update this post when I get started.
Read more from the source

Wednesday, December 28, 2016

Woodland Wisdom: Survival Trapping

Survival Trapping
Homemade Trap


Woodland Wisdom: Survival Trapping:                 To understand Survival trapping we must understand Animal behavior to some degree so let’s first explore that. All animal...

HOW TO MAKE BILTONG


HOW TO MAKE BILTONG, THE BEST SURVIVAL FOOD


Biltong  is a great survival food that has his origins in Southern Africa and it’s a variety of dried and cured meat. You can use a big variety of meats to produce biltong like beef , game meats, chicken, fish or even ostrich. First you have to cut out the fillets of meat.
The fillets must be cut into strips or flat pieces following the grain of the muscle. Biltong is similar to beef jerky in a certain way because both are cured-dried meats. The difference between biltong and beef jerky is that biltong is sliced after the drying  process  not  before like the beef jerky.
Ingredients for biltong

          Meat
         Black pepper
  • Coriander
  • Salt
  • Sugar or brown sugar
  • Vinegar
The modern day recipe may include:
  • Balsamic vinegar or malt vinegar
  • Bicarbonate of soda
  • Dry ground chili peppers
  • Onion powder
Preparation
The best way to prepare biltong is by marinating the meat in a vinegar solution (balsamic or cider vinegar work very well too) for a few hours. After soaking the meat must be drained of excess liquid. Meanwhile prepare the spice mixture that consists of equal amounts of :
  • Whole slightly roasted and roughly grounded coriander
  • Black pepper
  • Rock salt
  • Barbecue spice
Mix all the ingredients then ground roughly together. Sprinkle the mix all over the

Biltong, how to make biltong
Biltong

meat fillets and rub well to obtain an evenly distributed layer. After this process the meat must rest for a few hours or refrigerate overnight in order to absorb the flavors.
The next step is to pour off any excess of liquid.
The drying process
The drying process can be achieved in three ways:
  1. You can dry out the meat in cold air.
  2. On a cardboard or in a wooden box
  3. In a climate-controlled dry room
In colder climates biltong can be dried with the help of an electric lamp but care must be taken to ventilate as mold can form on the meat spoiling it.

A traditional slow dry will take 4 to 6 days but you can dry the biltong in an electric fan-assisted oven too. Set the oven to 100-160 degrees F and leave the door open in order to eliminate the moist air. You’ll have the same result as the traditional drying after 4-5 hours. The point is to eliminate as much moisture as possible. A longer drying process will prolong the shelf life from 2 to 3-4 years. Biltong can be eaten as a snack, added to stews for the great taste, sandwiches or make biltong-flavored potato chips.


If you have any other tip about biltong please write a comment in the section bellow.

Saving our forefathers ways starts with people like you and me actually relearning these skills and putting them to use to live better lives through good times and bad. Our answers on these lost skills comes straight from the source, from old forgotten classic books written by past generations, and from first hand witness accounts from the past few hundred years. Aside from a precious few who have gone out of their way to learn basic survival skills, most of us today would be utterly hopeless if we were plopped in the middle of a forest or jungle and suddenly forced to fend for ourselves using only the resources around us. To our ancient ancestors, we’d appear as helpless as babies. In short, our forefathers lived more simply than most people today are willing to live and that is why they survived with no grocery store, no cheap oil, no cars, no electricity, and no running water. Just like our forefathers used to do, The Lost Ways Book teaches you how you can survive in the worst-case scenario with the minimum resources available. It comes as a step-by-step guide accompanied by pictures and teaches you how to use basic ingredients to make super-food for your loved ones.

Source:
http://www.preparefordepressionnow.com/make-biltong-best-survival-food/


Wednesday, December 21, 2016

DIY Survival Candles


How to make candles for survival use
DIY Survival Candles

Candles are an easy-to-use source of emergency lighting and a little bit of heat. I'm shocked to see some of the prices that are charged for long burning candles sold for survival or emergency preparedness - if you want to buy a dozen or so candles, the cost really starts to add up.

Never fear! You can make your own survival candles at home for cheap, using high-quality, long burning soy wax. It's an easy project - the materials are easy to buy and you won't need any specialized tools.


Candle ingredients for survival use
Candle Ingredients

The materials you will need are:
  • Soy wax flakes. These are commonly used in making scented candles and are sold in craft stores or Amazon. I bought a 5 pound bag from Amazon for 12.79 shipped - right here. A pound of wax will fill around a 24 ounce container, give or take. You can use other wax, but soy is affordable, typically has a longer burn time than other waxes and has some other beneficial qualities (all-natural, renewable, etc.).
  • Canning jars. I purchased a dozen 8 ounce jars from Wal Mart for around $8. If you have jars around the house, no need to buy 'em. We've used jars from jams, sauces and so on for candles in the past.
  • Wicks and Tabs. You can find these on Amazon, eBay and at your craft stores. You'll want your wicks to be a bit longer than your candle holder is tall. I have 100 tabs and 100 nine inch wicks on eBay for about $10 total.

Read more from the source

Friday, December 9, 2016

21 DIY Emergency Preparedness Hacks

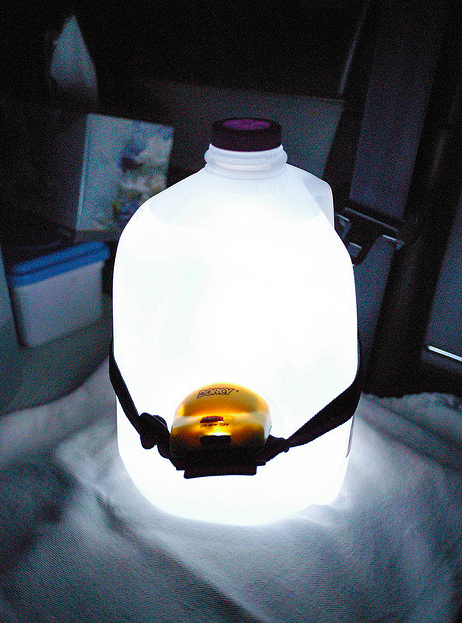
1. Strap a headlamp onto a water jug to make a light.


Make a light. Strap a headlamp to a milk jug for a light
Milk Jug Light

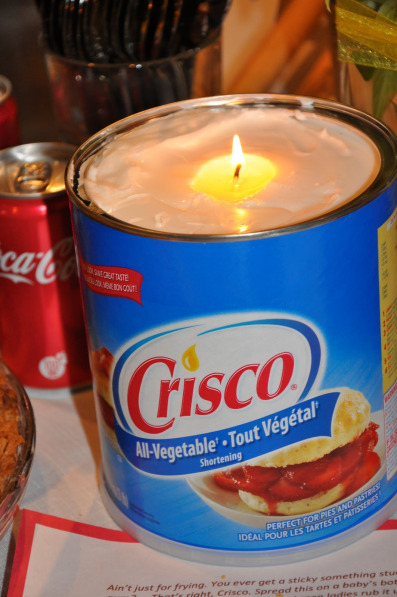
2. Make a candle out of Crisco.


How to make a candle out of Crisco.
Crisco Candle

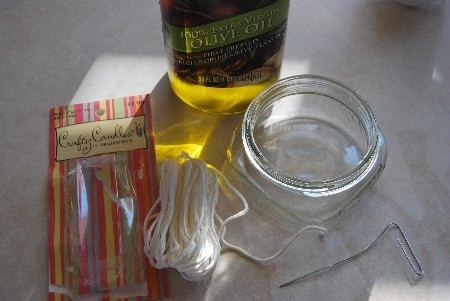
3. Or out of olive oil.


How to make a candle out of cooking oil
Cooking Oil Candle

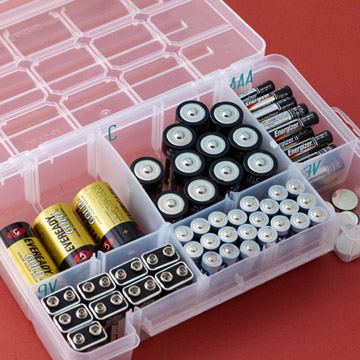
4. Stock up on batteries and keep them organized and protected from water damage.

How to store battery for emergency use
Battery storage

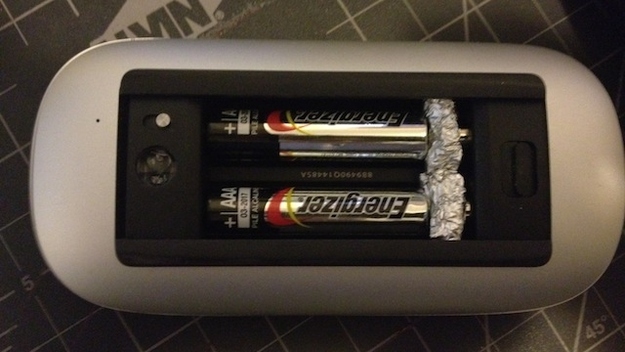
5. Convert AAA batteries to AA batteries with tin foil.


Convert AAA batteries to AA batteries with tin foil.
Convert AAA batteries to AA

Essential Knots For The Outdoors

Essential Knots
Knots

Wednesday, December 7, 2016

The Noah Candle

We have roughly 12 hours of natural light from the sun and the rest of the time we simply flip a switch and out pours a flood of artificial light. But what happens when the switch doesn’t work anymore?
Crisco Candle
Crisco Candle
Since the advent of electric lights, candles have become more of a decorative item than a tool. But anyone that has ever been caught in a blackout knows the real value of a candle.
You can purchase many “survival candles” that last 12-120 hours, but did you know that you can create a candle that will last for up to 45 days using something that you probably already have in your kitchen?
All you need is:
a 48oz tub of Crisco or smaller. The large tub will get you the 45 life span and anything smaller will burn significantly less
a spoon
an old candlestick or something else that can be used as a wick
There are a few options when it comes to creating a Noah candle.  One of the first things you need to decide is if you want a candle that will burn brighter or one that will last longer.
For a longer lasting candle you will use only one wick and for a brighter candle you will use anywhere from 2-4 wicks depending on the size of the container.
Regardless of how many wicks you decide to use or the size of the Crisco tub that you choose, the directions are the same.
Take your spoon and remove a small portion of the Crisco directly in the center (for a single wick candle) if you are using an old candlestick. Then simply press the candlestick down into the shortening until it touches the bottom.  Use the shortening that was removed previously to fill in any divots.
Smooth the top of the Crisco down until it is completely flat, then trim the excess candle and wick until you only have about 1/4” of wick sticking out above the top of the shortening.
Light and enjoy.
If you are using a standalone wick, you may need to dig down to the bottom of the can in order to get the base of the wick to lie flat against the bottom of the tub.  Then simply melt the shortening and use it to fill in the hole that was left.
As a caution: the container of the Crisco is made of a paper material and as such may catch on fire if you place the wick too close to the outer edge of the tub.

Source:
https://survivallife.com/an-emergency-candle-that-noah-would-be-proud-of/